Legendary Tales 3 Chapter 4 Walkthrough – Little Witch
Legendary Tales: Stories · bonus story · last updated 2026-10-15
Chapter overview and locations
A student at a magic school decides to prove her worth after her teacher dismisses her interest in real magic instead of books. She gathers reagents, grows and brews a growth potion, and follows clues out of the school into a dark forest. The story ends at a cliff nest where she takes a griffin feather.
Scenes in this chapter: Magic school classroom with bookshelves and a constellation blackboard · School grounds, garden beds and gates · Dark forest with a tree creature and a burning hollow · Rocky cliff ledge with a griffin nest
Step-by-step walkthrough
Follow the scenes below. Required items and screenshots sit beside each stop; answers expand on request. Select a screenshot to enlarge it.
Jump to a scene · 3 sections
Scene 01
Search the school and reach the garden
Open the school and inspect the griffin book. Prepare the magic ink, use the scissors clue and repair the plank bridge.
1School key puzzle
Where: Chapter 4, marker L
You need: Key found in the classroom
Use the school key to enter the opening room.
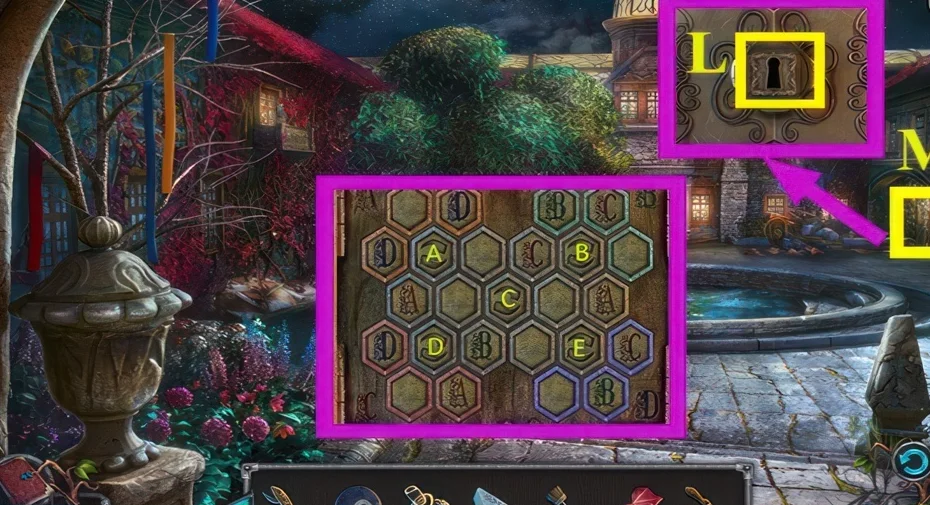
Show the full solution
C, C, C, B, E, E, C, C, C, C, B, E, C, D, E, E, E, C, D, then E, E, C, D, C, E, E, E, E, C, E, C, A, C, A, A, C, E, C, E, E.
2Book about griffins puzzle
Where: Chapter 4, marker M
Inspect the book about griffins after entering the school.
We could not confirm a solution for this one yet, so there is nothing to spoil here.
3Magic ink puzzle
Where: Chapter 4, marker T
You need: Magic ink
Prepare and use the magic ink at its matching interaction.
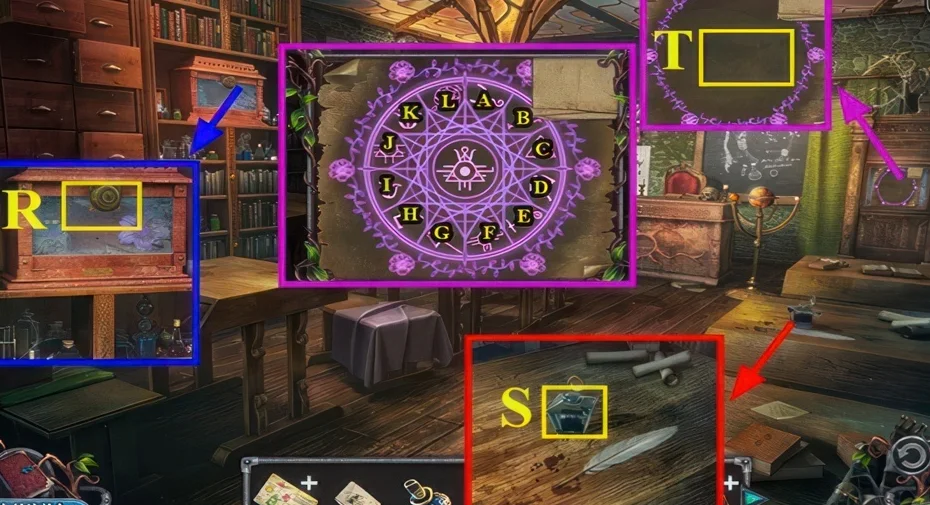
Show the full solution
K, F, C, G, L, B, E, A, J, E, I, H, D, which yields the reagent and plank 3/4.
4Clue puzzle for the scissors
Where: Chapter 4, marker U
You need: Clue
Use the clue to complete the board and recover the scissors.
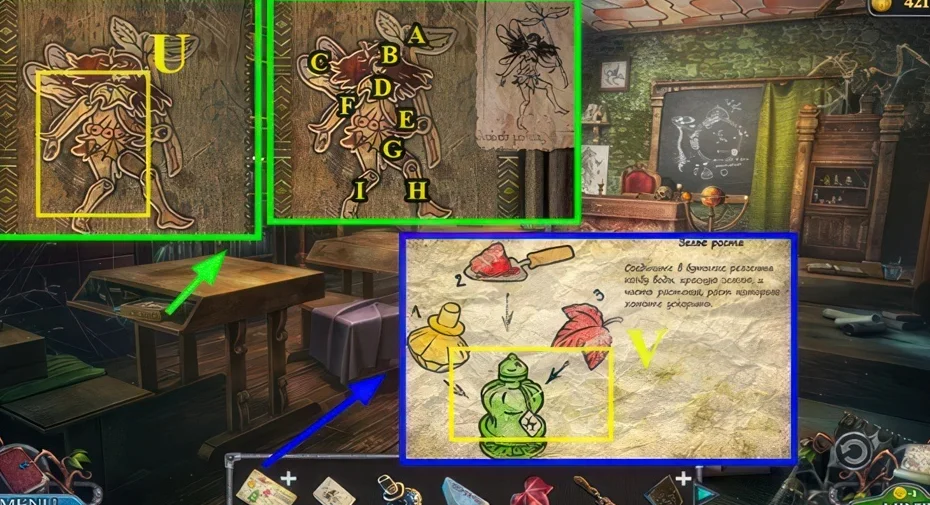
Show the full solution
C, B, E, A, I, G, H.
5Plank bridge puzzle
Where: Chapter 4, marker Z
You need: Planks 4/4
Use the planks to repair the bridge.
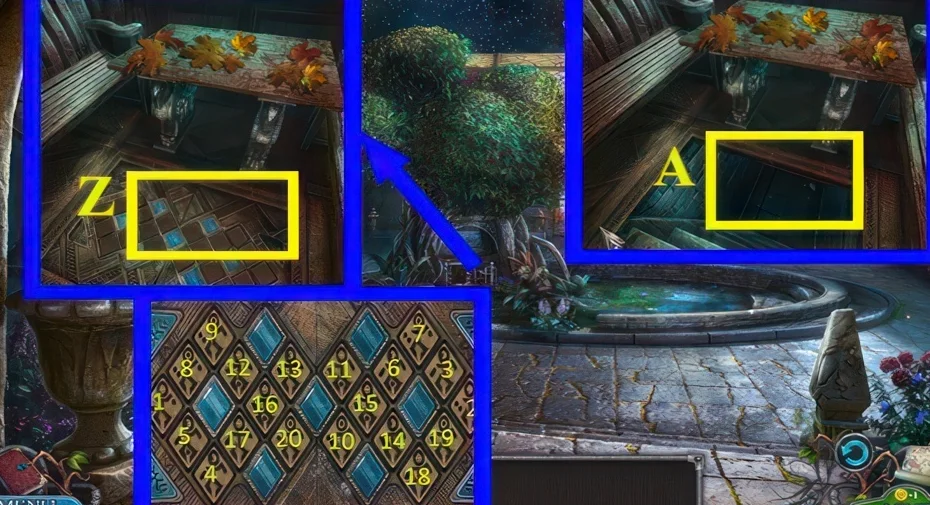
Show the full solution
1 to 20 in order.
Scene 02
Work through the garden gate
Follow the apple scene, garden hoe, basket detail and stone gate. Keep the charcoal clue for its own board.
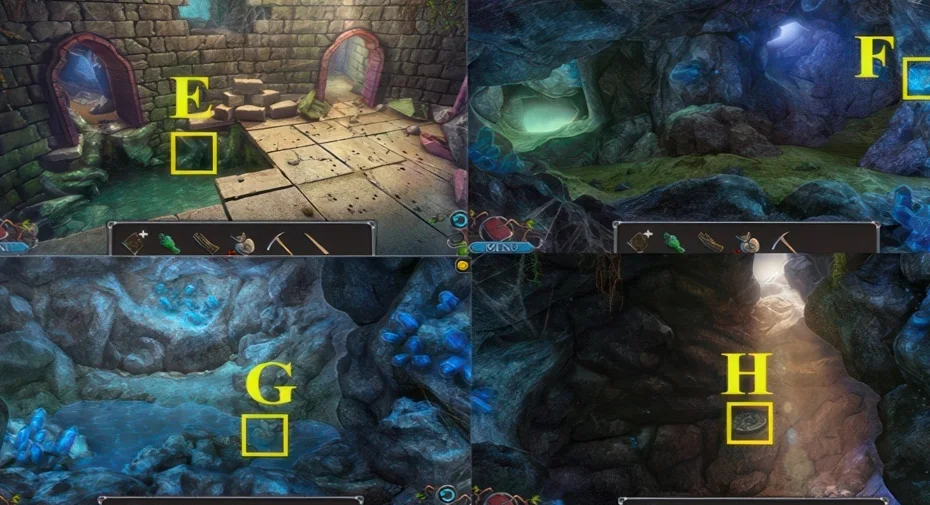
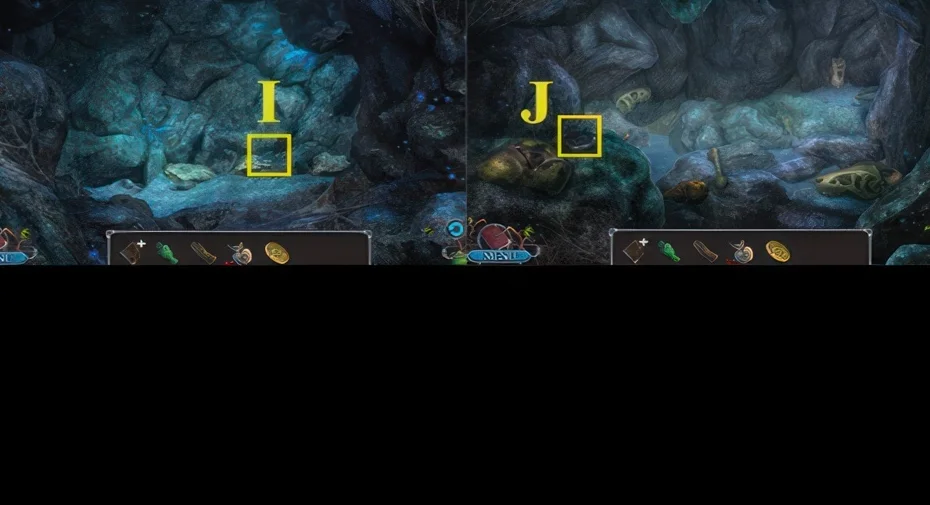
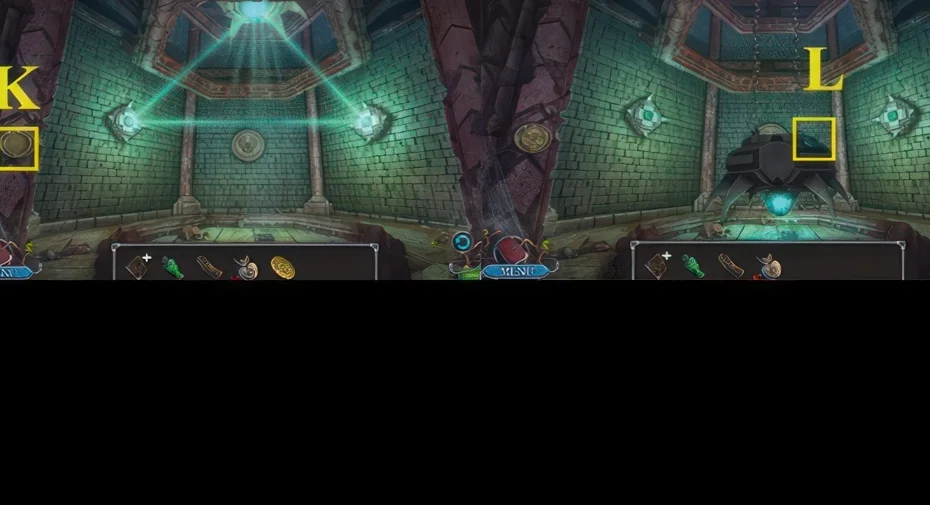
6Apple gate scene
Where: Chapter 4, markers A to M, across the school grounds and forest
You need: 7 apples · Pickaxe · Board · Signet
Search the apple gate scene before continuing into the garden.
7Puzzle that yields the garden hoe
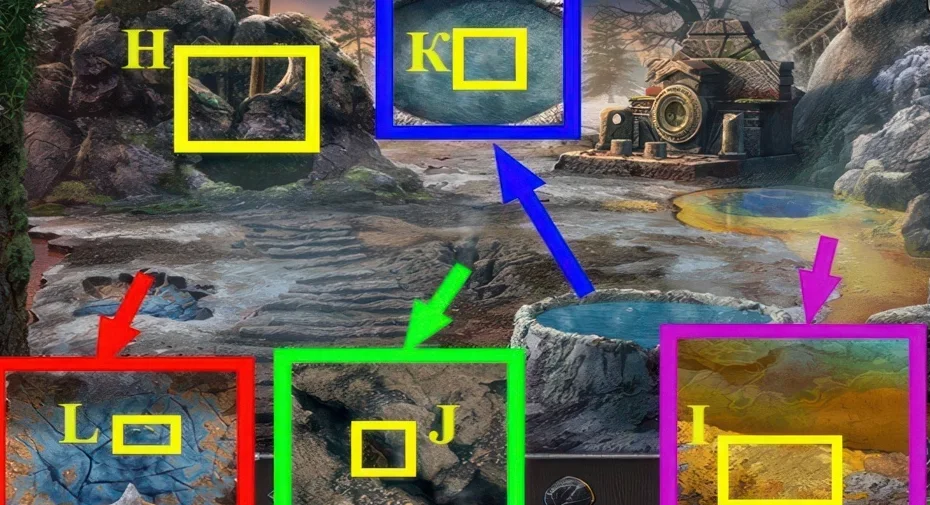
Where: Chapter 4, marker H
Complete the mechanism and collect the garden hoe.
We could not confirm a solution for this one yet, so there is nothing to spoil here.
8Detail puzzle for the basket
Where: Chapter 4, marker V
You need: Detail
Use the detail at the mechanism that yields the basket.
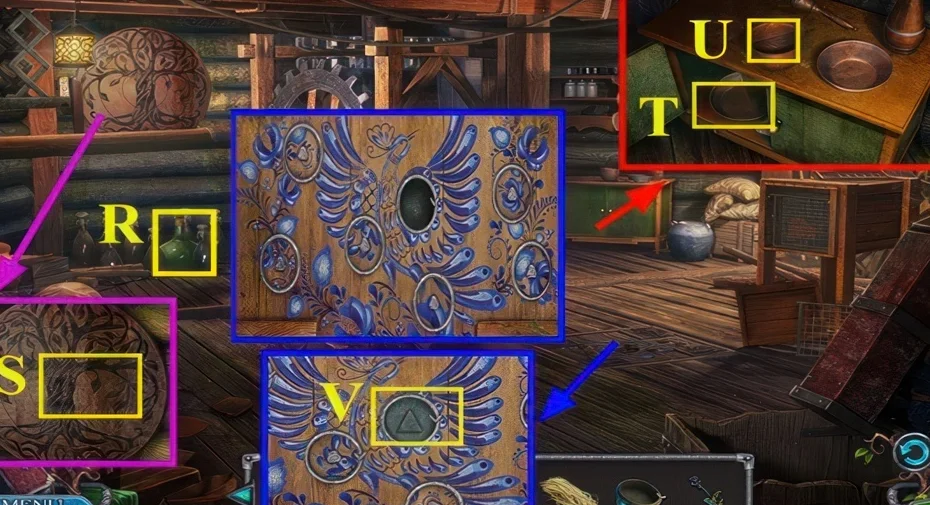
We could not confirm a solution for this one yet, so there is nothing to spoil here.
9Stone gate puzzle
Where: Chapter 4, marker Z
You need: Stone
Fit the stone at the gate mechanism.
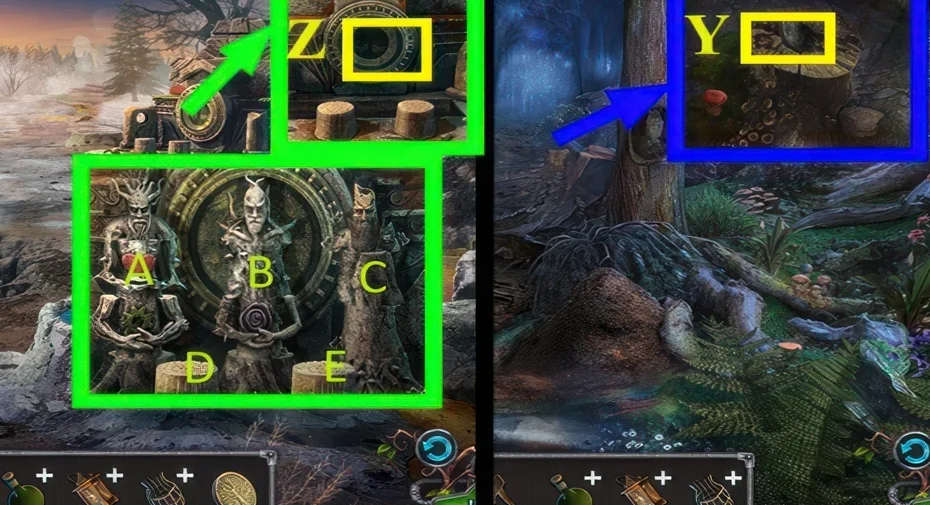
Show the full solution
C-D, C-E, C-E, D-E, A-D, A-C, A-C, D-C, E-D, E-A, D-A, B-E, B-D, then B-D, A-B, D-A, B-A, E-D, E-B, C-E, C-B, E-B, C-E, D-E, D-C, E-D, E-C, D-C, which yields the griffin figurine and paper.
10Charcoal clue puzzle
Where: Chapter 4, marker G, after making the clue at marker E
You need: Paper · Charcoal · Runes 3/3 · Clue
Use the charcoal clue on the matching board.
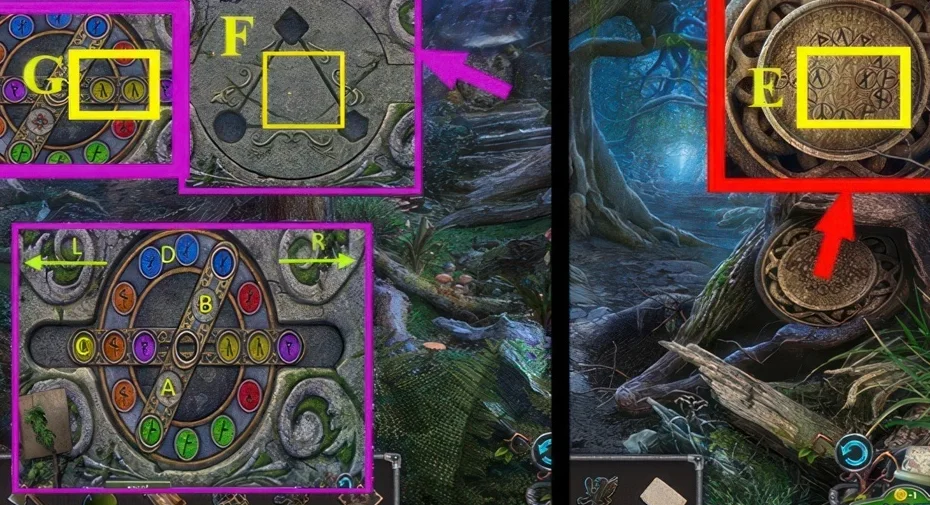
Show the full solution
CR1, DR2, CL1, DR1, B, DR1, B, CL1, DR2, CR1, B, DR2, B, DL2, B, DL2, A, then DR2, A, DL1, B, DL1, A, DR1, A, DL1, A, DL3, A, DL3, A, DR3, A, B, DR1, A, DR1, A, then DR1, A, DL2, B, DR2, B, DL2, B, DR1, B, DR1, which yields the knife.
Scene 03
Prepare the lantern and griffin
Prepare the honey and wax, light the lantern and finish the griffin figurine mechanism.
11Honey and wax assembly
Where: Chapter 4, markers K to P in the forest scenes
You need: Knife · Waterskin with boiling water · Piece of cloth · Rope
Prepare the honey and wax for the next item interaction.
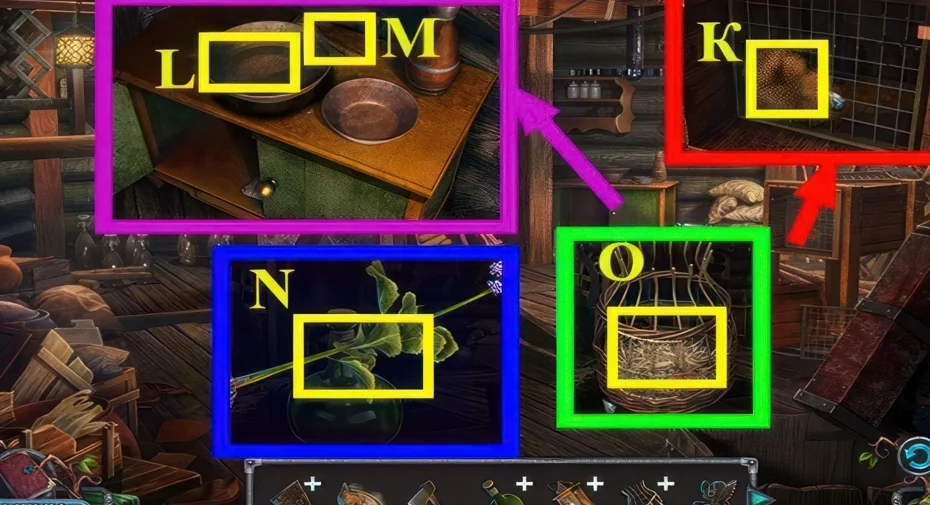
Show the full solution
Cut the honeycombs, drag the bowl under them for honey and wax, make the valerian infusion and the carrier, then use them at marker P for the griffin nestling.
12Lit lantern puzzle
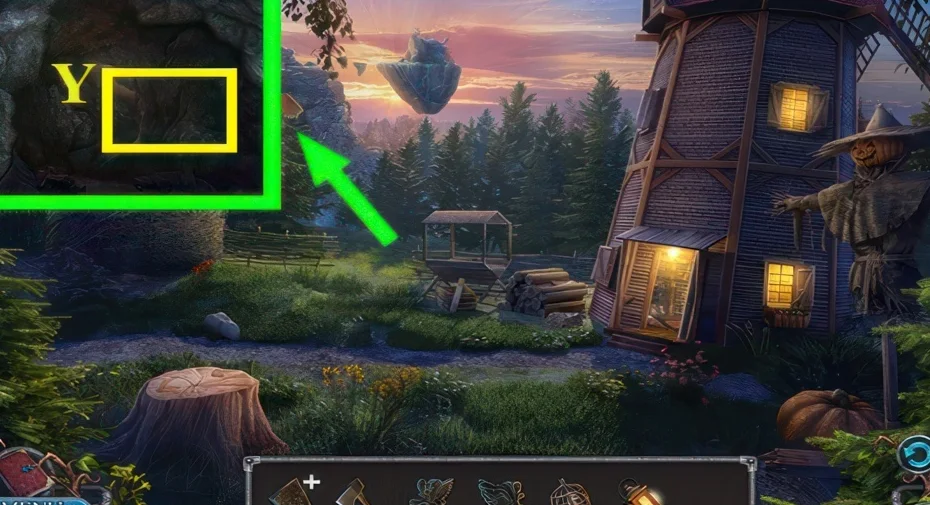
Where: Chapter 4, marker Y
You need: Lit lantern
Light the lantern and bring it to the marked location.
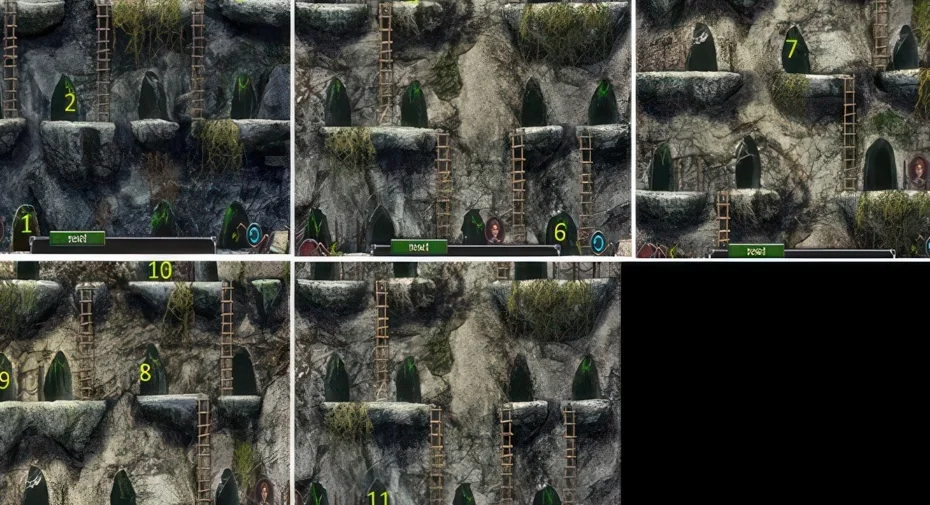
13Griffin figurine puzzle
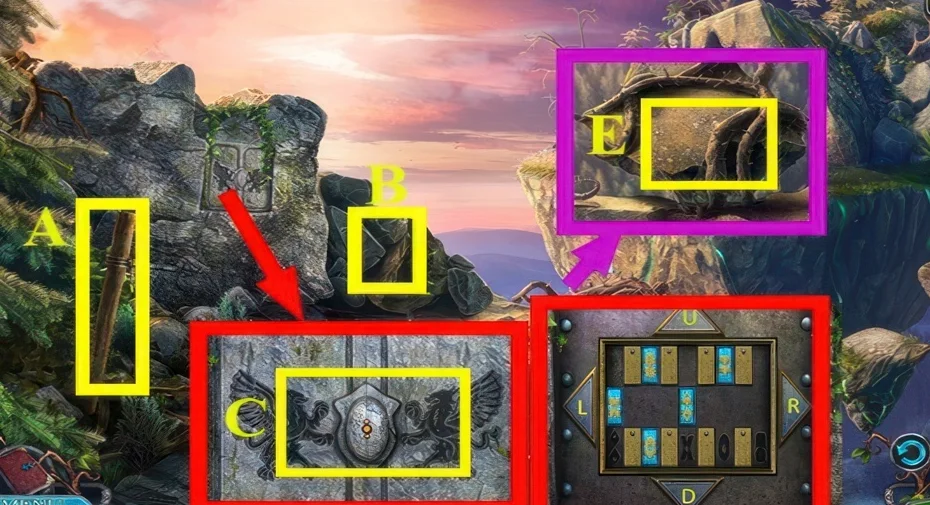
Where: Chapter 4, marker C
You need: Griffin figurine · Second griffin figurine
Use the griffin figurine to complete the final mechanism.
Show the full solution
D, D, R, R, R, R, R, R, D, U, R, D, R, R, R, D, L, L, L, L, L, L, D, L, D.
This guide covers the researched puzzle stops. Some connecting exploration and item pickups are still being documented.
Collectibles along the way
- Apples · 7 in this chapter (as stated by sources) — Numbered 1/7 to 7/7 across the school and forest, then used at marker M.
- Planks · 4 in this chapter (as stated by sources) — Numbered 1/4 to 4/4 and used on the broken walkway.
- Runes · 3 in this chapter (as stated by sources) — Numbered 1/3 to 3/3, used with the clue to open the forest door.
- Wooden eyes · 2 in this chapter (as stated by sources) — Numbered 1/2 and 2/2, used at marker P.
Open the Legendary Tales 3 collectibles checklist to tick items off as you play.