Legendary Tales 3 Chapter 3 Walkthrough – Osbert Comes to the Rescue
Legendary Tales: Stories · last updated 2026-10-15
Chapter overview and locations
Osbert, an experienced soldier, helps his friend Mira after a witch attack by finding her hidden children. He searches a village, a tavern, forest, a hillside hideout, a sunken carriage underwater and a cave pool. The chapter ends with the children recovered and a final assembly puzzle in the cave.
Scenes in this chapter: Village house interior with an injured woman · Village outskirts with carts and sacks, and a tavern interior with barrels · Forest clearing with a giant stump door carved with animal reliefs and a pond · Wooded hillside with a barricaded wooden door · Underwater scene with a sunken carriage and a chained anchor · Cave pool with a campfire, raft and a rope ladder
Step-by-step walkthrough
Follow the scenes below. Required items and screenshots sit beside each stop; answers expand on request. Select a screenshot to enlarge it.
Jump to a scene · 4 sections
Scene 01
Search the house and prepare the cauldron
Open the first house and work through the oven. Continue with the fish figurines, path board, valve wheel and cauldron.
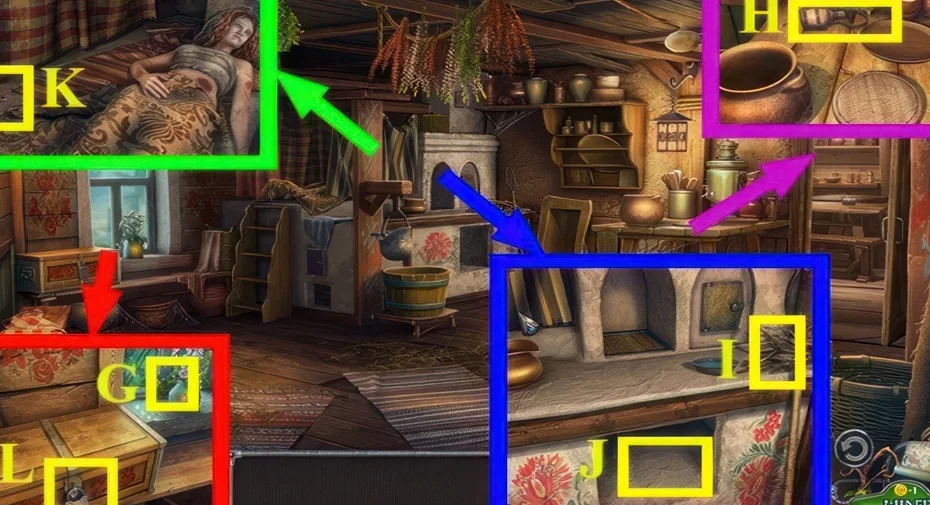
1Key lock in the first house
Where: Chapter 3, marker L
You need: Key
Use the key at the first house lock.
Show the full solution
Use the key to take the recipe book, cloth and rope.
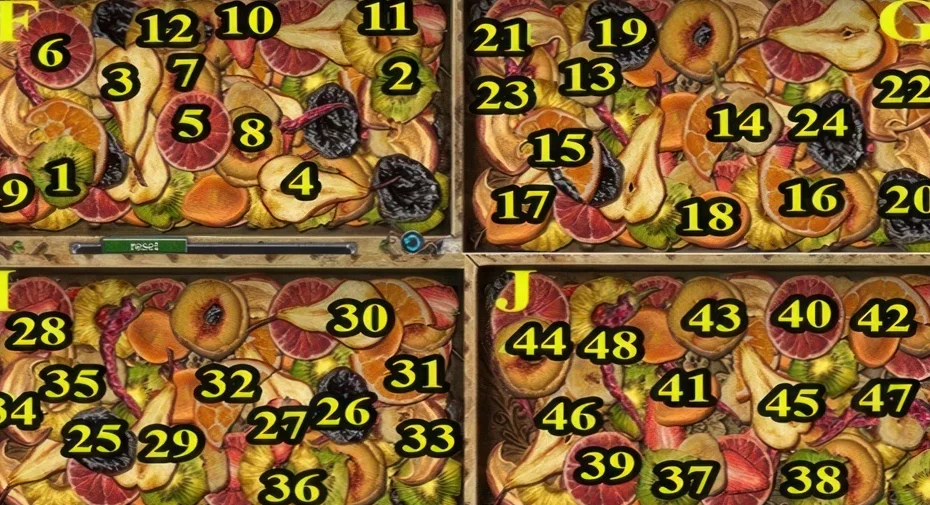
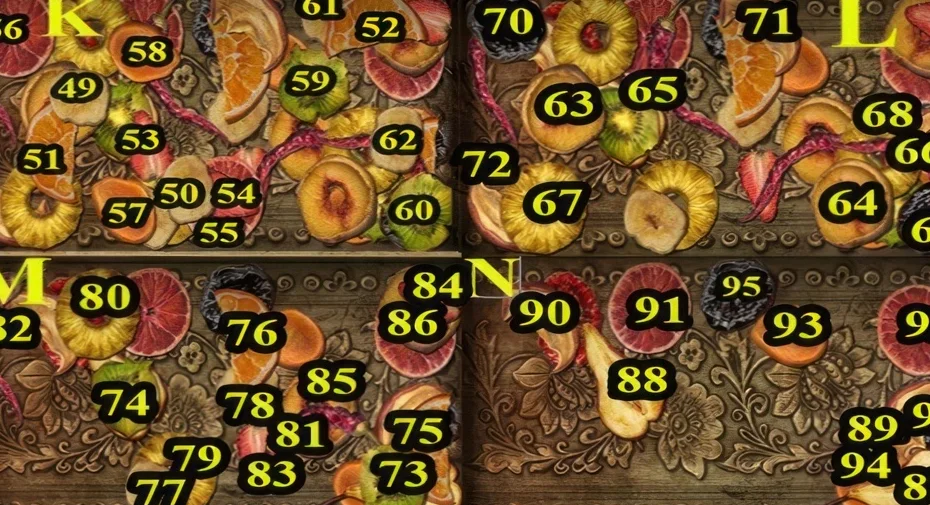
2Two stage oven puzzle
Where: Chapter 3, marker E, in the drying shed
Complete both stages of the oven mechanism.
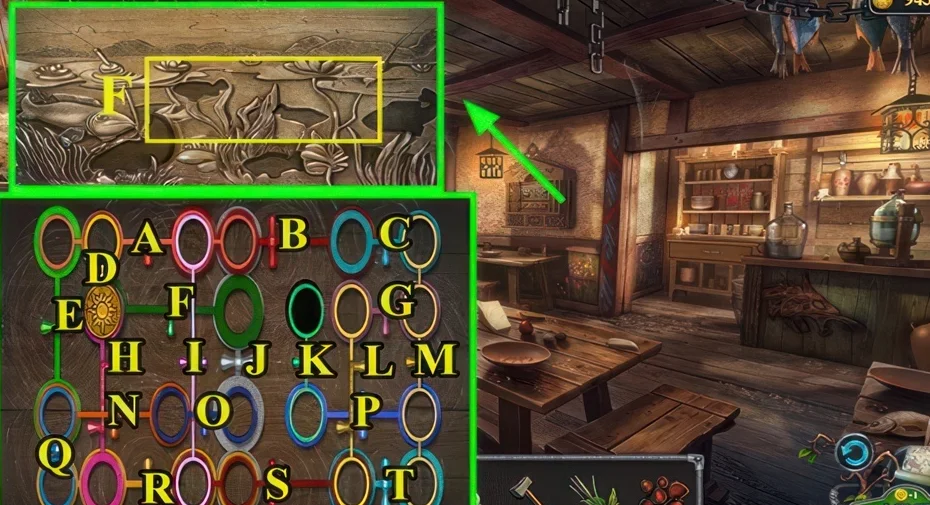
3Fish figurine pedestal puzzle
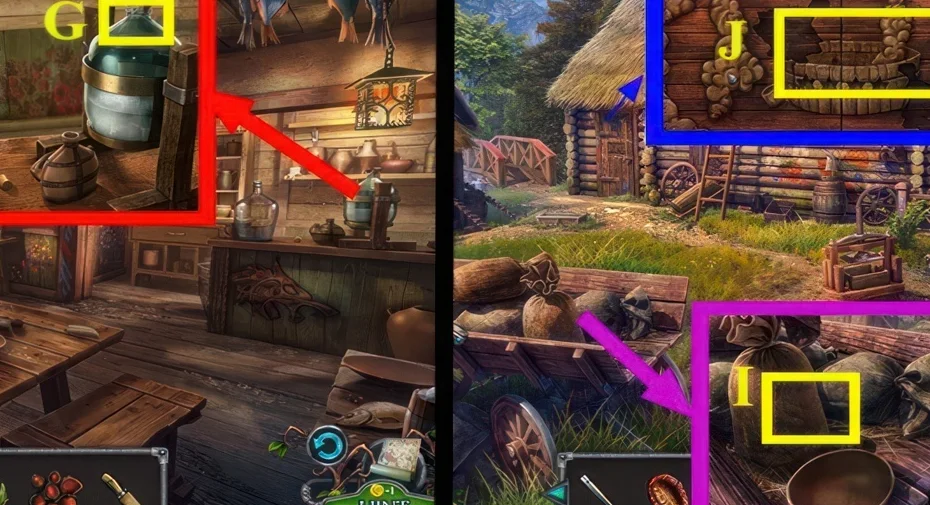
Where: Chapter 3, marker F, at the tavern counter area
You need: Fish figurines 5/5
Place all five fish figurines on the pedestal to obtain the knife and the next figurines.
Show the full solution
D, A, I, S, L, G, M, P, K, which yields the knife and figurines 2/2.
4Figurine path puzzle
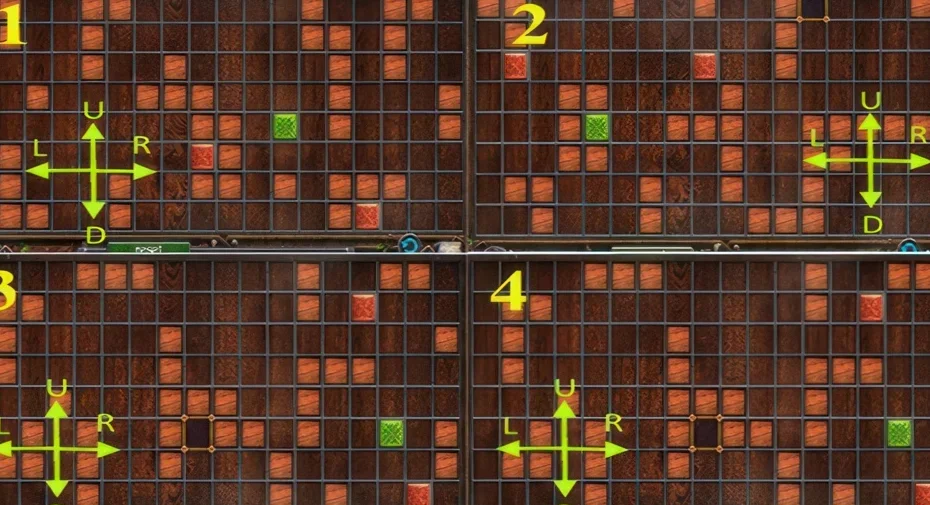
Where: Chapter 3, marker J, on the four-column board
You need: Figurines 2/2
Use the two figurines on the four-column path board.
5Puzzle that yields the valve wheel
Where: Chapter 3, marker K
Complete the next mechanism and collect the valve wheel.
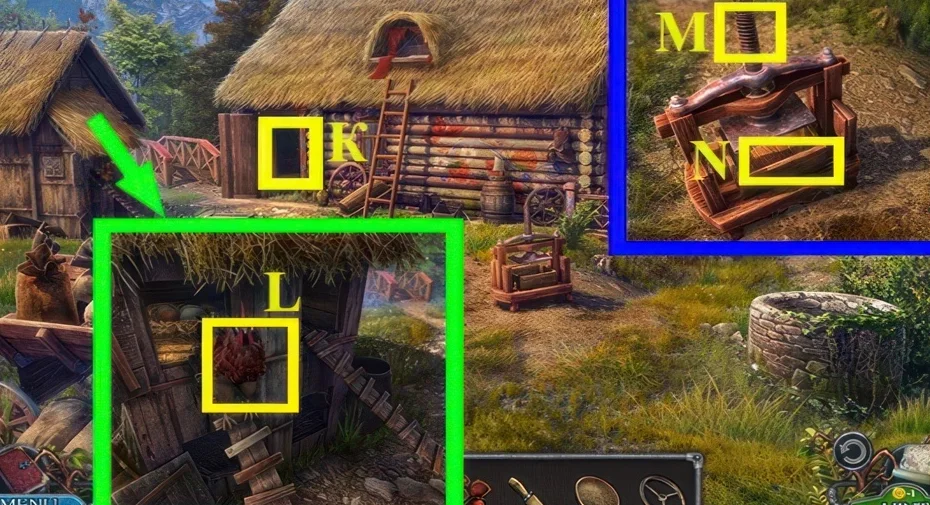
We could not confirm a solution for this one yet, so there is nothing to spoil here.
6Cauldron ingredient assembly
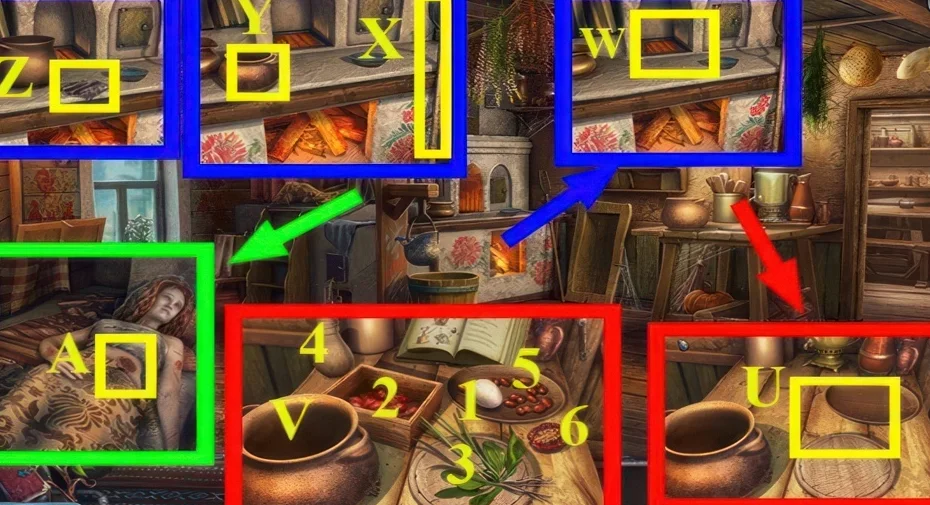
Where: Chapter 3, marker V, in the brewing scene
You need: Dried tomato · Plantain · Crushed strawberries · Egg · Rosehip · Maple sap
Bring the cauldron ingredients together before using the preparation station.
Show the full solution
Drag items 1 and 2 to the cauldron, cut item 3 with the knife and drag it in, then drag items 4, 5 and 6 and take the cauldron.
Scene 02
Cross the forest and follow the bird clues
Use the frog, honeycombs and peanuts for the forest route. Continue with the torch, rose and bird-figurine detail.
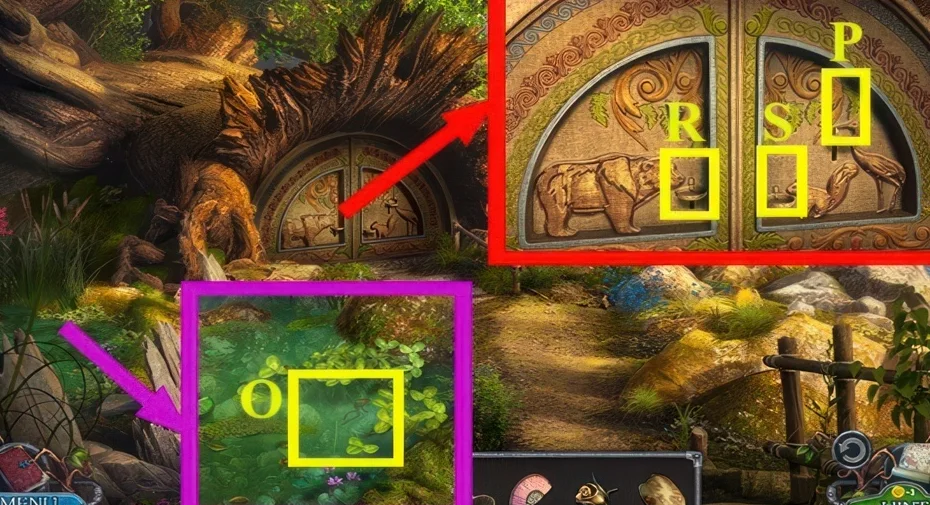
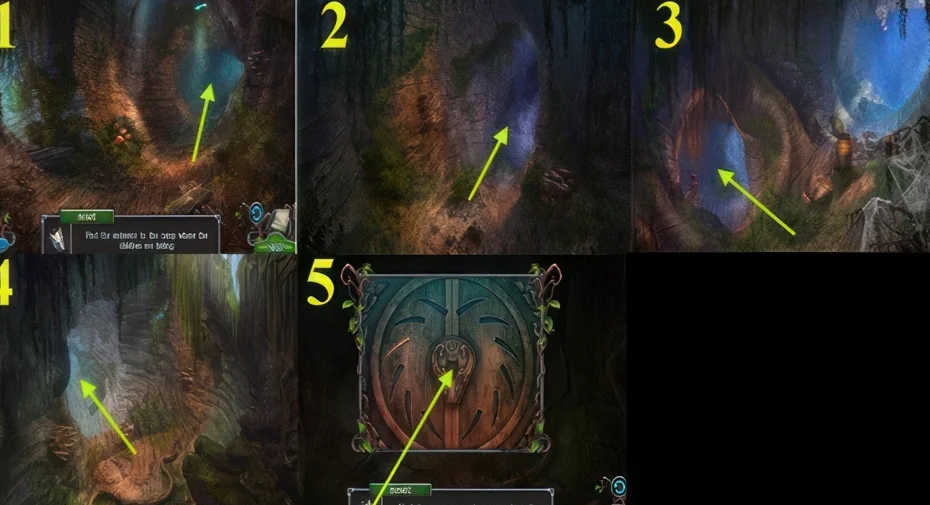
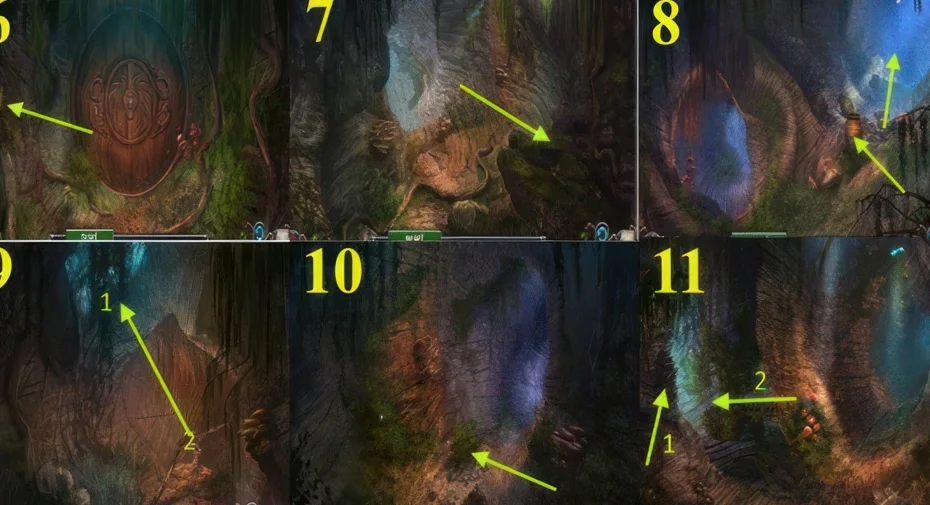
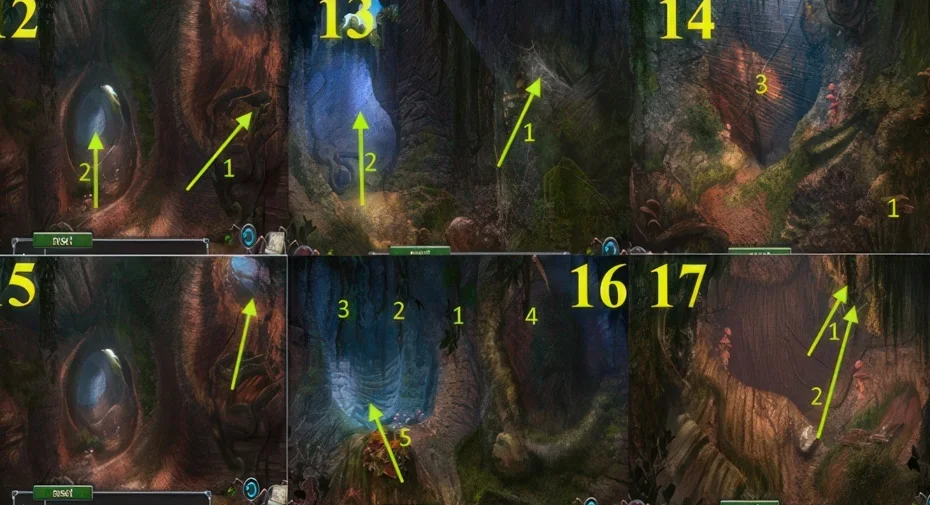
7Four part forest puzzle
Where: Chapter 3, the puzzle after the frog and honeycomb steps
You need: Frog · Honeycombs · Peanuts
Use the frog, honeycombs and peanuts along the forest route, then complete its four puzzle stages.
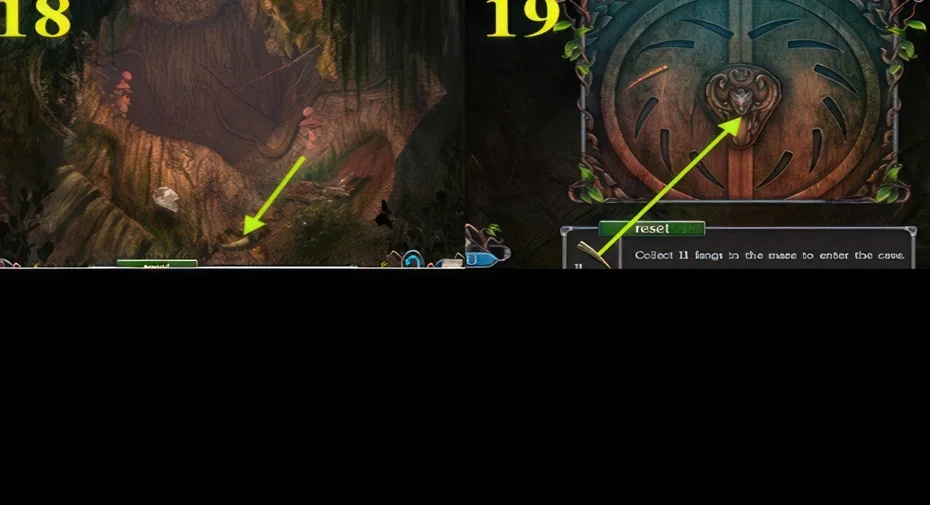
8Burning torch chain puzzle
Where: Chapter 3, marker N, in the cave mouth
You need: Burning torch
Use the burning torch at the chain mechanism.
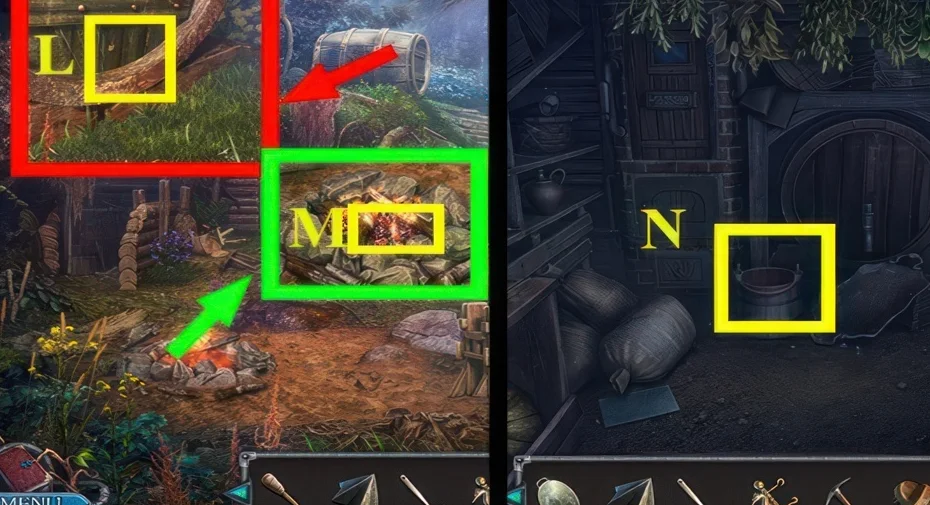
We could not confirm a solution for this one yet, so there is nothing to spoil here.
9Rose hint puzzle
Where: Chapter 3, marker W, after brushing the board for the hint
You need: Roses
Compare the rose clue with the matching board.
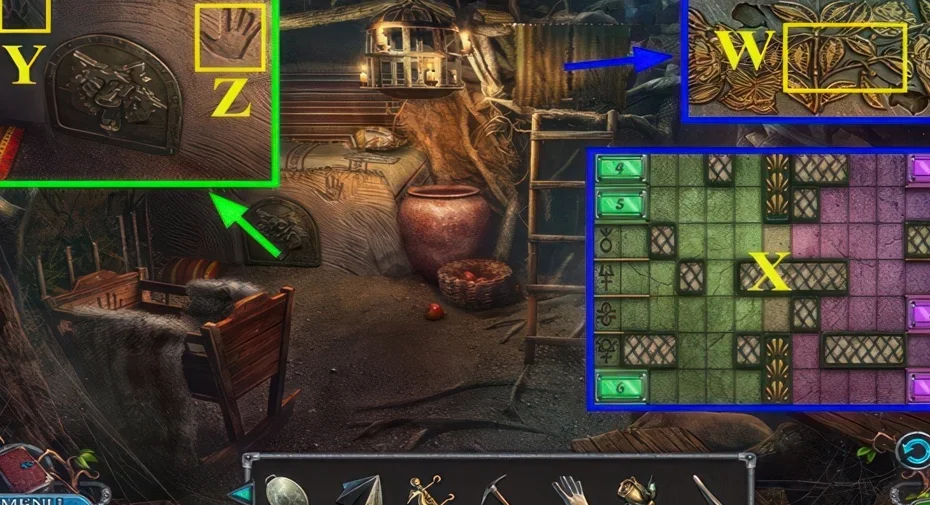
Show the full solution
The walkthrough states the puzzle is solved with the hint shown at marker X and gives no separate sequence.
10Detail puzzle for the bird figurine
Where: Chapter 3, marker C
You need: Detail
Use the detail at the mechanism that yields the bird figurine.
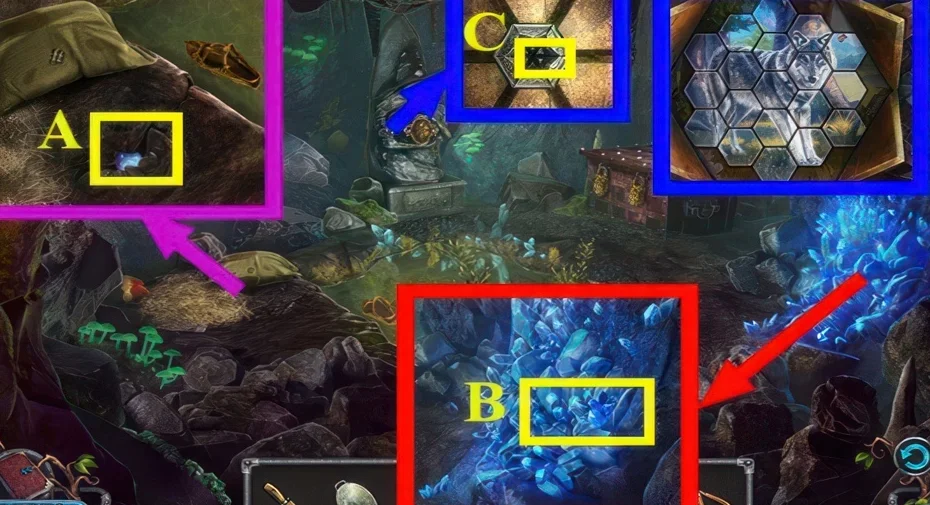
We could not confirm a solution for this one yet, so there is nothing to spoil here.
Scene 03
Explore the garden and brew the glow potion
Use both feathers and the stone detail. Follow the bird mosaic and gem clue before mixing the glow potion.
11Feather swap puzzle
Where: Chapter 3, marker M, using both feathers
You need: Feathers 2/2
Collect both feathers and return to the feather-swap board.
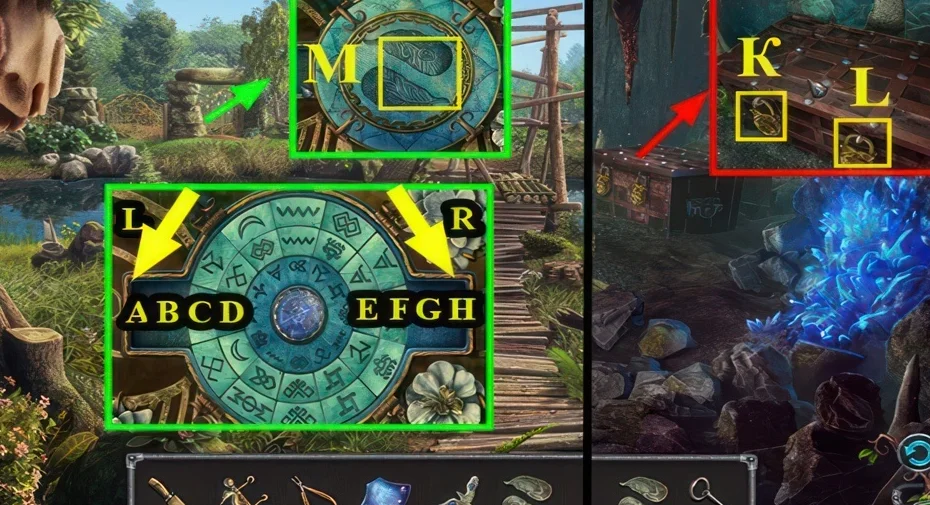
Show the full solution
C, F, ER1, E, DR2, D, EL6, G, EL2, B, EL1, D, ER4, E, DR6, B, EL4, G, then the follow-up chains printed in the walkthrough ending DL4, D, EL2, B, EL4, G, EL1, H, FR2, F, CL6, A, CR1, C, CL3, H, CL2, F, CL1, H, CL4, F, CR5, H, CR1, F, CR6, A, H, CL2.
12Detail stone puzzle
Where: Chapter 3, marker S, near the shuttered door
You need: Detail
Fit the detail to the stone board near the shuttered door.
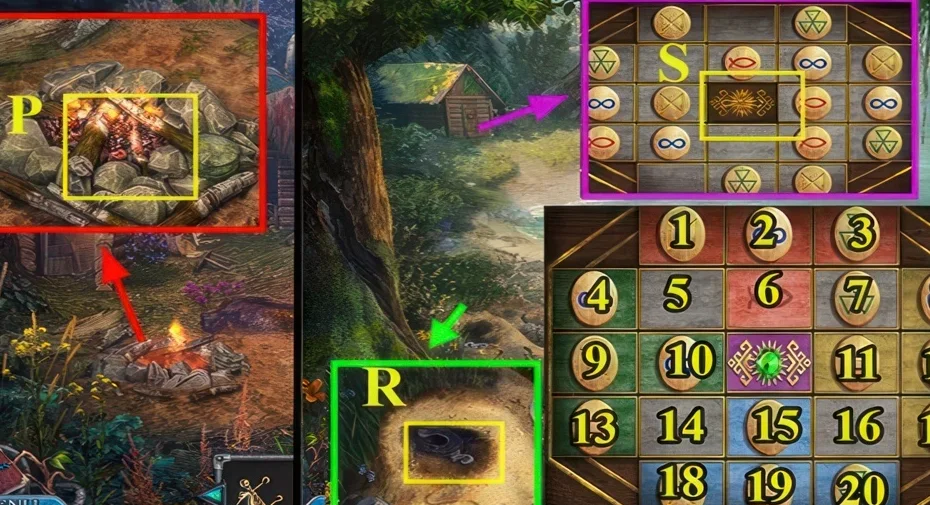
Show the full solution
7-5, 11-7, 7-6, 8-7, 7-16, 10-14, 5-10, 4-5, 9-4, 10-9, 14-10, 15-14, 19-15, then the four follow-up lines printed in the walkthrough ending 6-7, 2-6, 3-1, 6-2, 2-3, 7-5.
13Bird figurine mosaic puzzle
Where: Chapter 3, marker J, after taking the bird figurines
You need: Bird figurines
Place the bird figurines to start the mosaic and recover the hint and bronze flower.
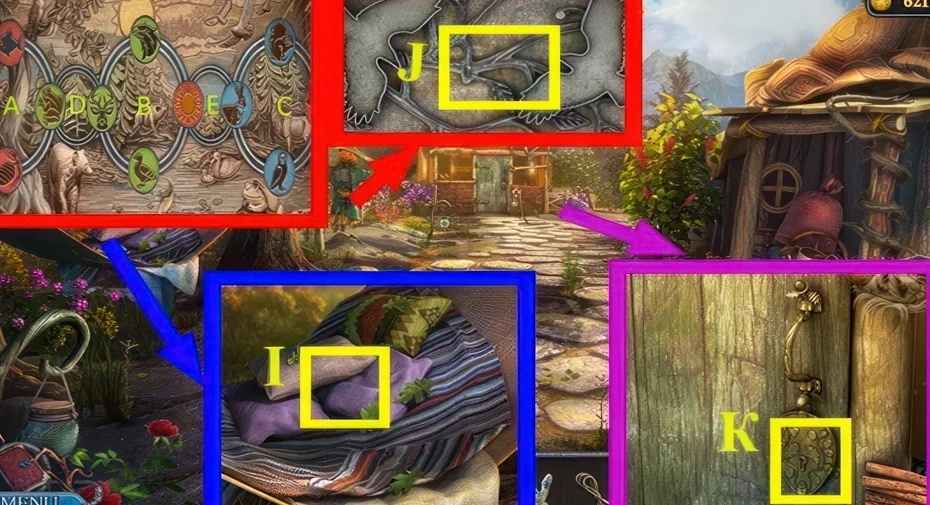
Show the full solution
C, E, B, B, A, A, A, D, C, C, E, B, A, B, D, C, E, B, A, B, D, A, B, E, then B, B, C, C, E, C, C, B, C, E, B, B, B, E, C, C, C, C, E, C, C, E, C, C, C, E, C, E, C.
14Hint gem puzzle
Where: Chapter 3, marker R, after using the hint
You need: Hint
Use the hint at the gem mechanism.
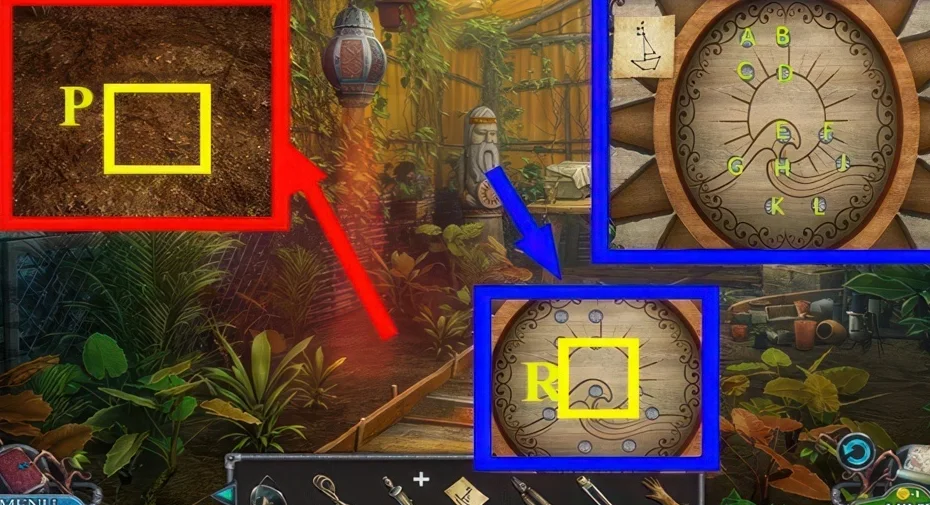
Show the full solution
H, G, K, L, J, H, B, A, C, D, F, E, which yields the Tears of Verida.
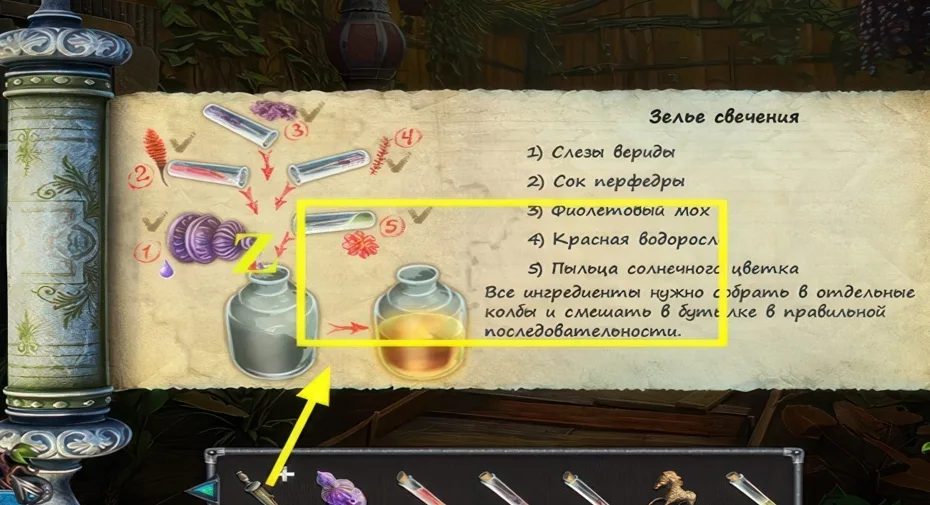
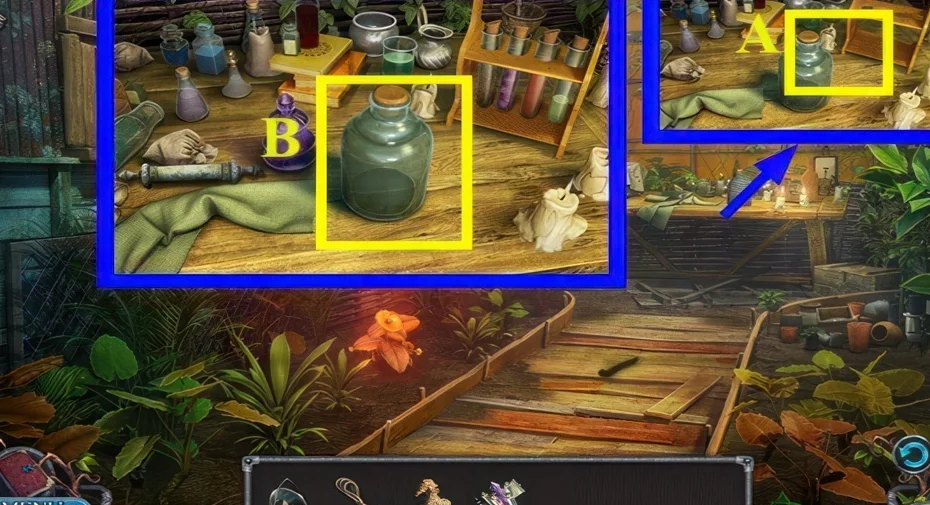
15Glow potion brewing
Where: Chapter 3, marker A, in the garden laboratory
You need: Sun flower pollen · Red algae · Purple moss · Perphedra juice · Tears of Verida
Combine the five listed ingredients, then use the ingredient mixture at the laboratory to make the glow potion.
Scene 04
Open the cave and build the raft
Recover the final detail, use it at the cave door and assemble the raft with the boards, rim and cable.
16Puzzle that yields the detail
Where: Chapter 3, marker M, after the toy horse opens the chest
You need: Key
Complete this board and recover the detail for the cave route.
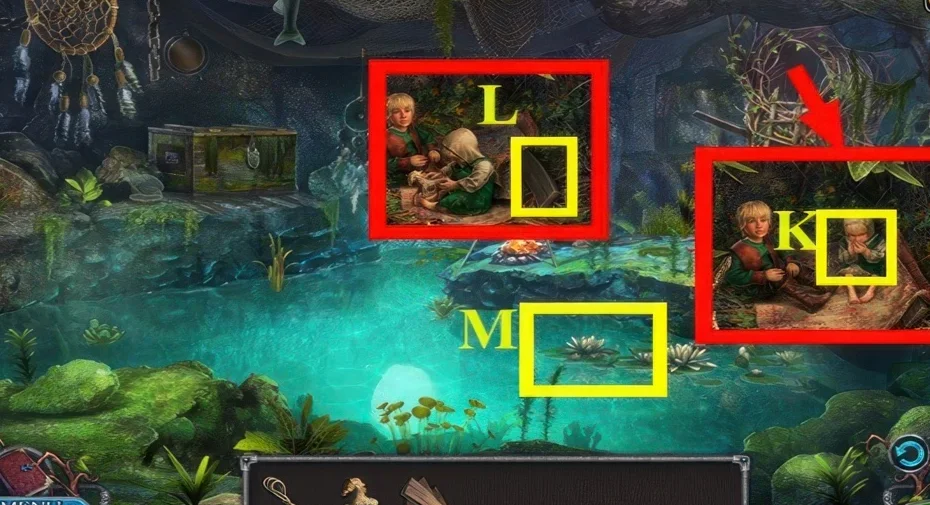
We could not confirm a solution for this one yet, so there is nothing to spoil here.
17Cave door detail puzzle
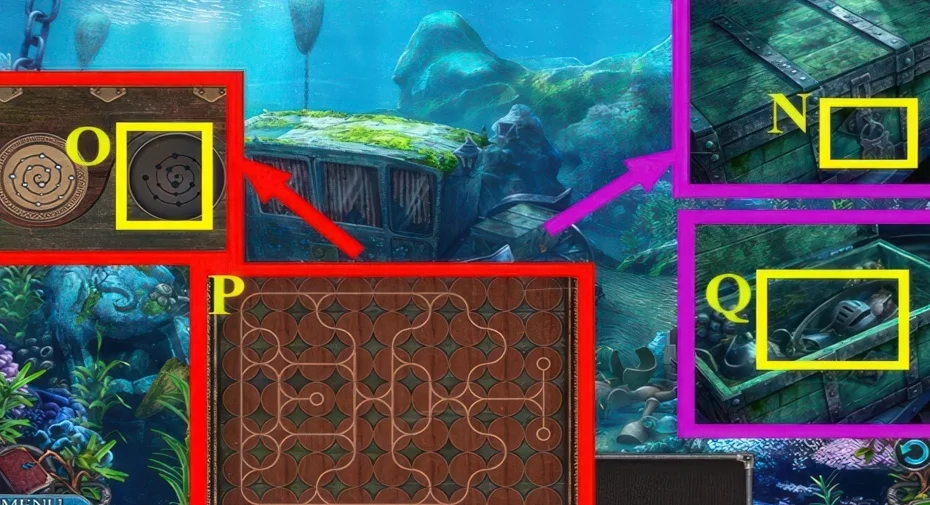
Where: Chapter 3, marker O, and the following key puzzle
You need: Detail
Use the detail at the cave door.
Show the full solution
The walkthrough gives one line only, shown as a screenshot sequence at marker P.
18Raft assembly and cable puzzle
Where: Chapter 3, marker U, the chapter finale
You need: Boards 10/10 · Rim · Cable
Fit all ten boards and the rim, then use the cable to finish the raft interaction.
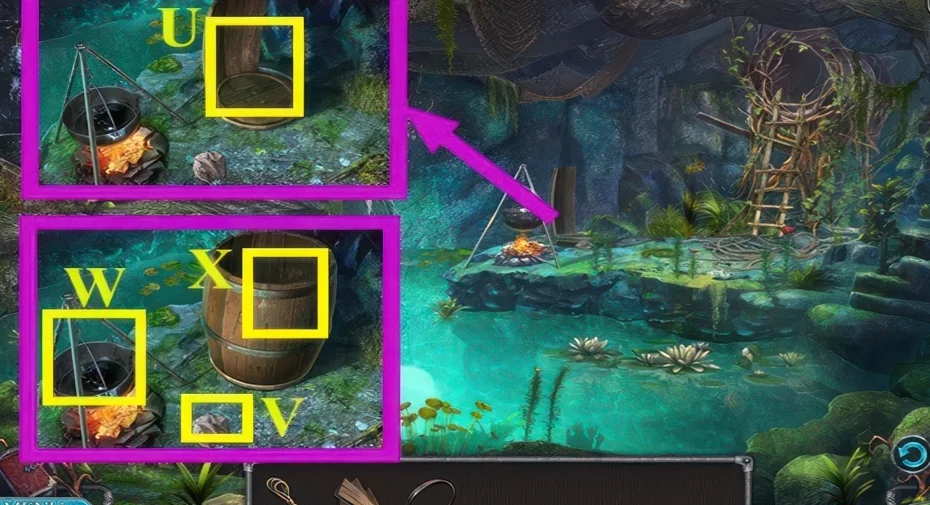
Show the full solution
Use the boards and rim at marker U, drag marker V to marker W, use the cable at marker X and take the key.
This guide covers the researched puzzle stops. Some connecting exploration and item pickups are still being documented.
Collectibles along the way
- Fish figurines · 5 in this chapter (as stated by sources) — Numbered 1/5 to 5/5; some are dirty and must be washed at marker B.
- Boards · 10 in this chapter (as stated by sources) — Numbered 1/10 to 10/10 across the cave; AppGamer players report the tenth board is the hard one to find.
- Firewood and logs · 6 in this chapter (as stated by sources) — Two counted sets of six, Firewood 1/6-6/6 and Logs 1/6-6/6.
- Feathers · 2 in this chapter (as stated by sources) — Feathers 1/2 and 2/2, used at marker M.
Open the Legendary Tales 3 collectibles checklist to tick items off as you play.
Commonly missed
- The board lying beside the children at the end of the chapter cannot be taken until the key on the rug is picked up (AppGamer answer).
- The 10th board, which AppGamer players report not being able to locate.