Legendary Tales 1 Chapter 4 Walkthrough – Waterfall
Legendary Tales: Stolen Life · last updated 2026-10-15
Chapter overview and locations
Lucia reaches the temple before dawn with the activated sarcophagus key. She repairs the elevator with the miller's help, prepares a medicinal ointment for a griffin nestling, and the chapter closes with the ritual in the crypt.
Scenes in this chapter: Temple approach · Elevator shaft · Waterfall and miller's mill · Griffin nest · Crypt · Ceremonial hall
Step-by-step walkthrough
Follow the scenes below. Required items and screenshots sit beside each stop; answers expand on request. Select a screenshot to enlarge it.
Jump to a scene · 3 sections
Scene 01
Enter the waterfall passage
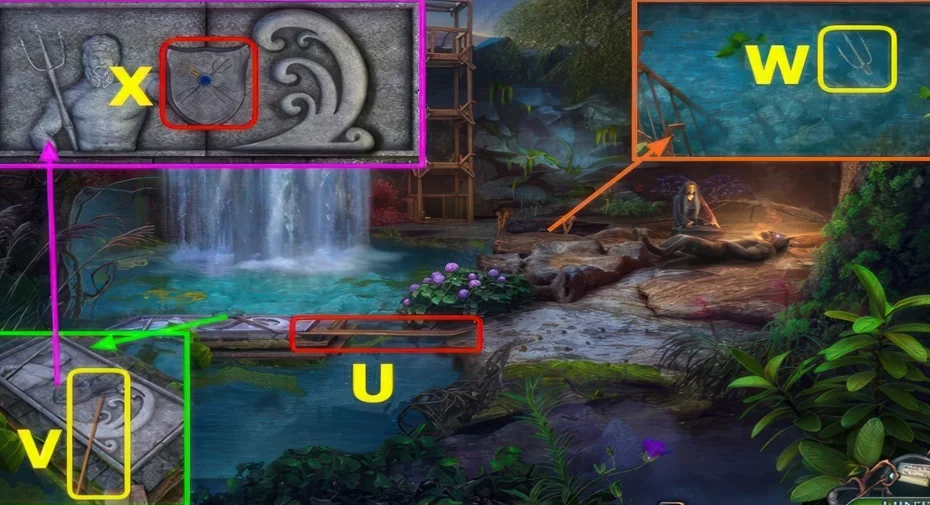
Use the trident at the gate and operate the elevator. Check the ruby interaction before continuing up the climbing route.
1Trident gate
Where: Temple approach
You need: Tridents (three pieces) · Board · Net
Three trident pieces open the way to the temple.
Show the full solution
Gather all three trident pieces, using the board and the net to reach the last one, and place them at the gate.
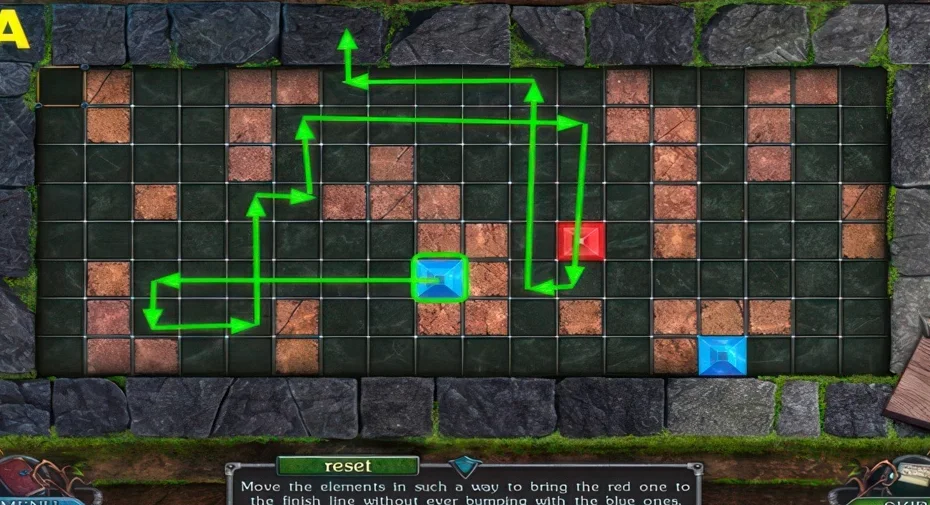
2Elevator token path
Where: Elevator shaft
You need: Board · Net · Pickaxe
The red token must reach the finish without touching the blue ones, and every piece moves at the same time.
We could not confirm a solution for this one yet, so there is nothing to spoil here.
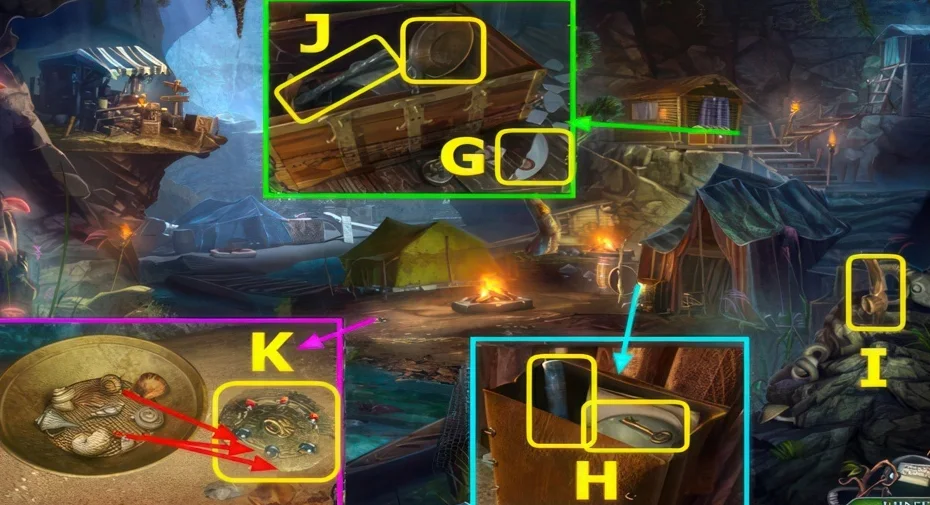
3Three rubies under the strainer
Where: Miller's area
You need: Strainer
Rubies have to be shifted to reach what is buried beneath.
Show the full solution
Use the strainer and move the three rubies to obtain the medallion.
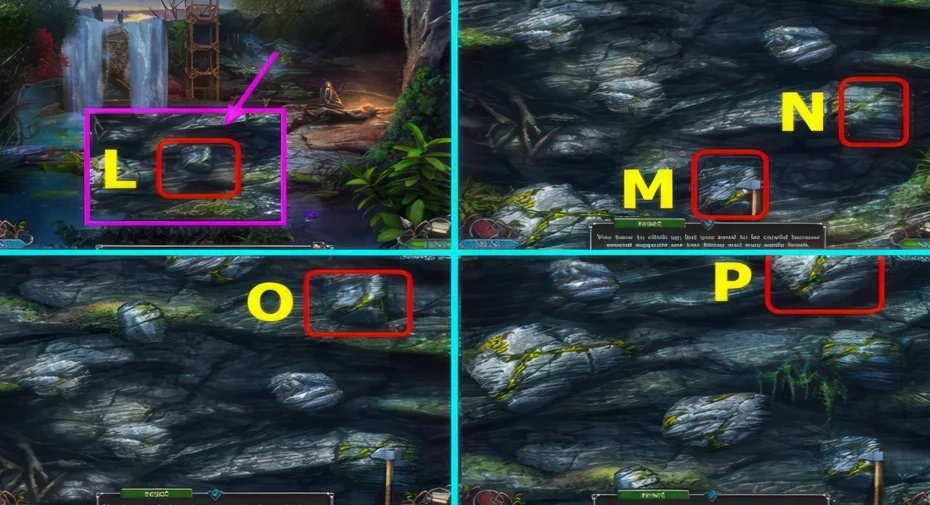
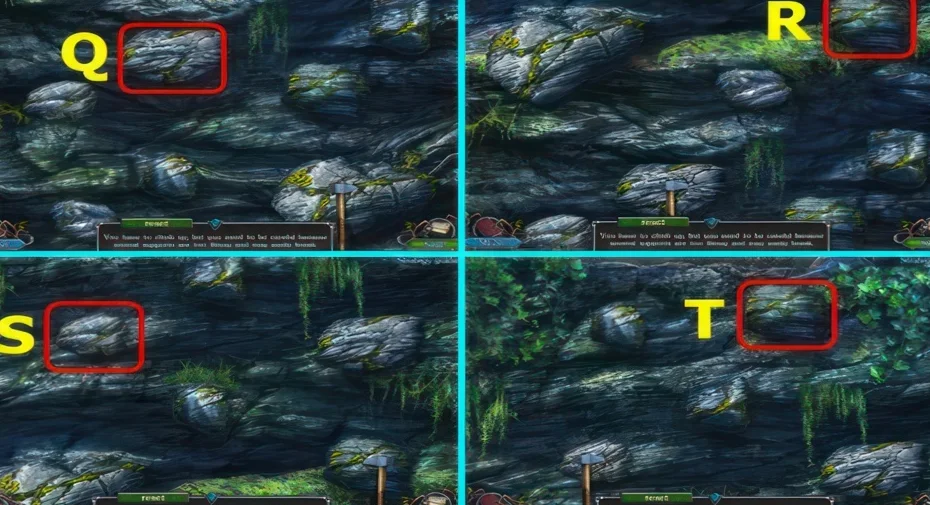
4Climbing support choice
Where: Cliff above the elevator
You need: Pickaxe
Some supports are too weak and break under weight.
Scene 02
Prepare the ointment and open the way
Bring the recipe ingredients together, then continue through the pyramid and carriage mechanisms.
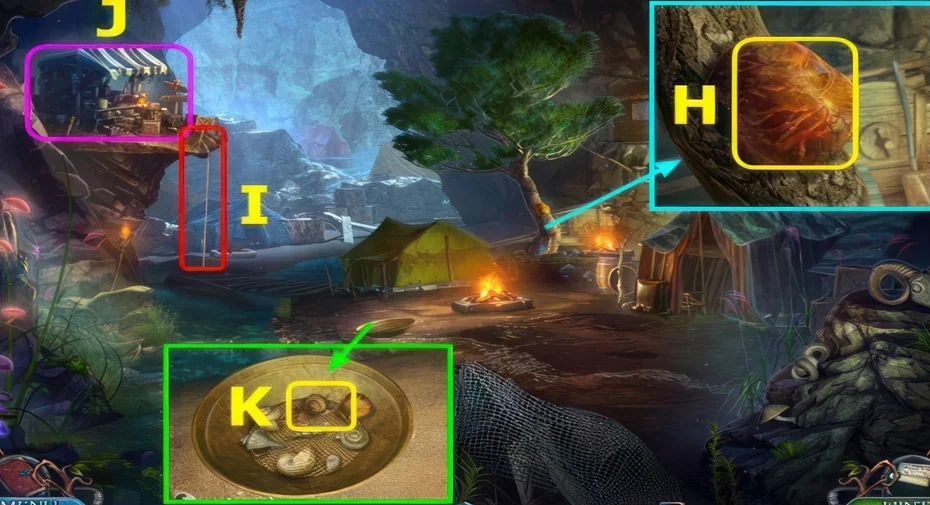
5Ointment ingredient recipe
Where: Miller's mill nest
You need: Ointment recipe · Flower of purity · Frosty rowan · Snail
The recipe lists three ingredients that are found around the mill.
Show the full solution
Combine the flower of purity, frosty rowan and snail on the ointment recipe, then use the result at the fire to make the medicinal ointment.
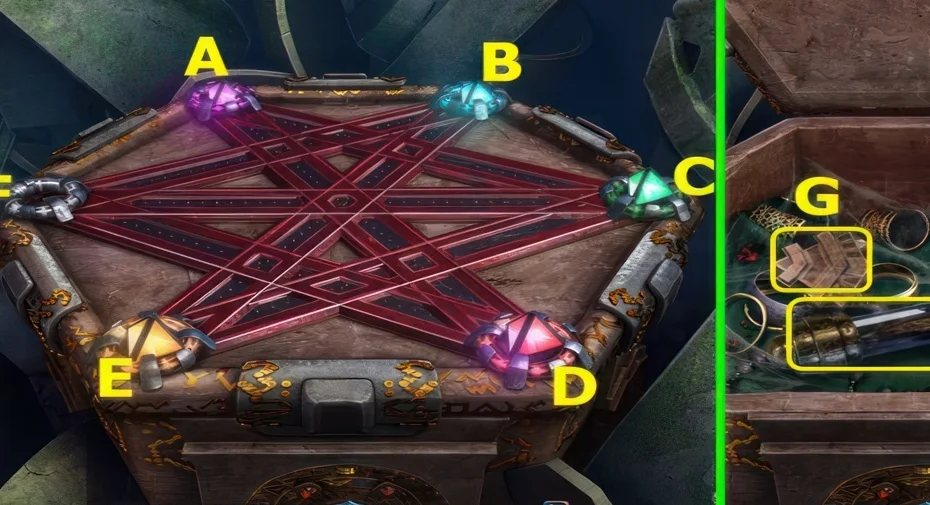
6Pyramid colour matching
Where: Crypt
You need: Medallion
Swap the pyramids so each rests on a circle of its own colour.
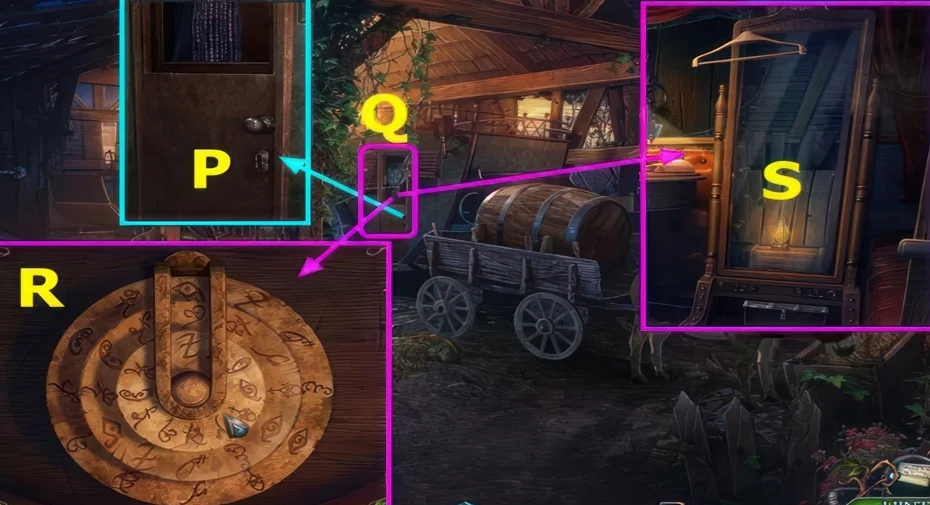
7Carriage sign disks
Where: Carriage beside the crypt
You need: Carriage key · Hay
Rotating the disks sets the symbols into the frame.
We could not confirm a solution for this one yet, so there is nothing to spoil here.
Scene 03
Finish the golem and book mechanisms
Complete the sword board before setting the final book disks. Keep the diagrams beside their own solutions.
8Golem sword line puzzle
Where: Crypt
You need: Activated sword of the golem · Crystal (two pieces) · Scissors · Flask with alcohol
Place the pieces so no line is crossed, and a correct line turns green.
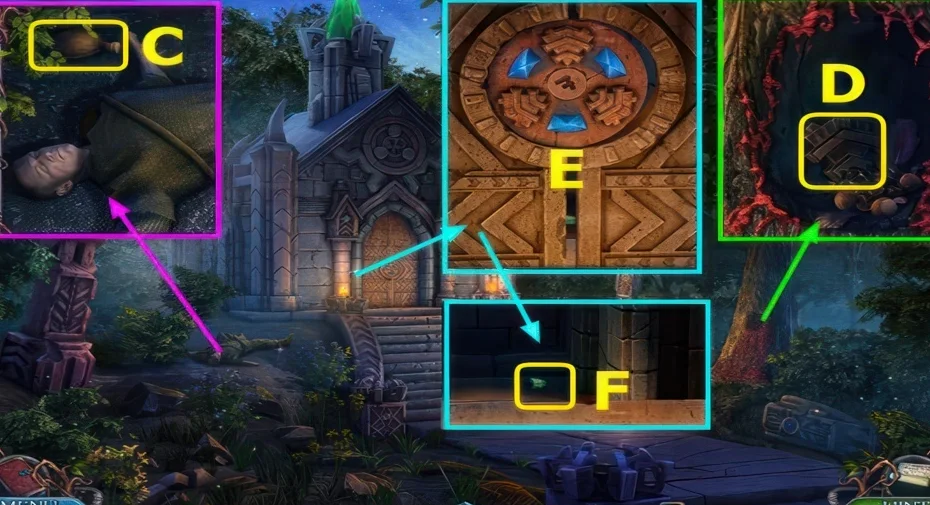
We could not confirm a solution for this one yet, so there is nothing to spoil here.
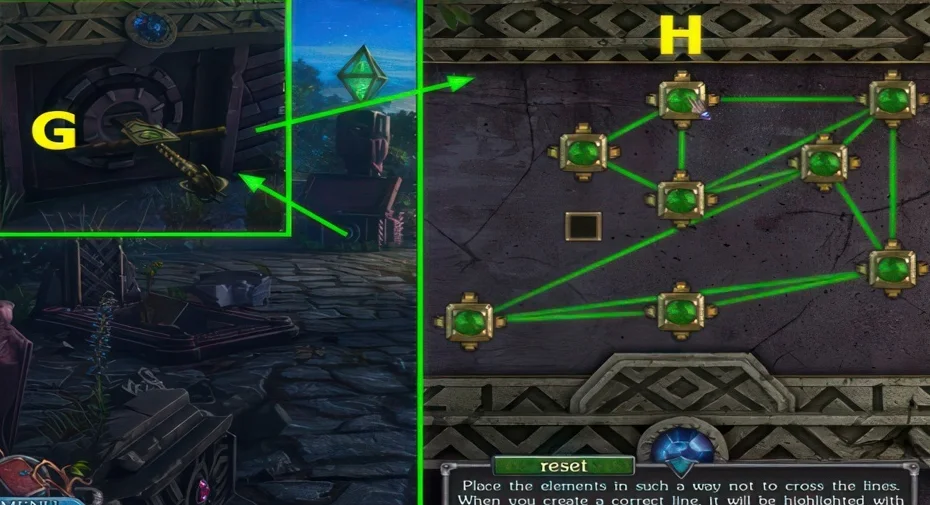
9Final book disk setting
Where: Ceremonial hall
You need: Book · Stamp · Broom
The disks are set exactly as the illustration in the book shows.
We could not confirm a solution for this one yet, so there is nothing to spoil here.
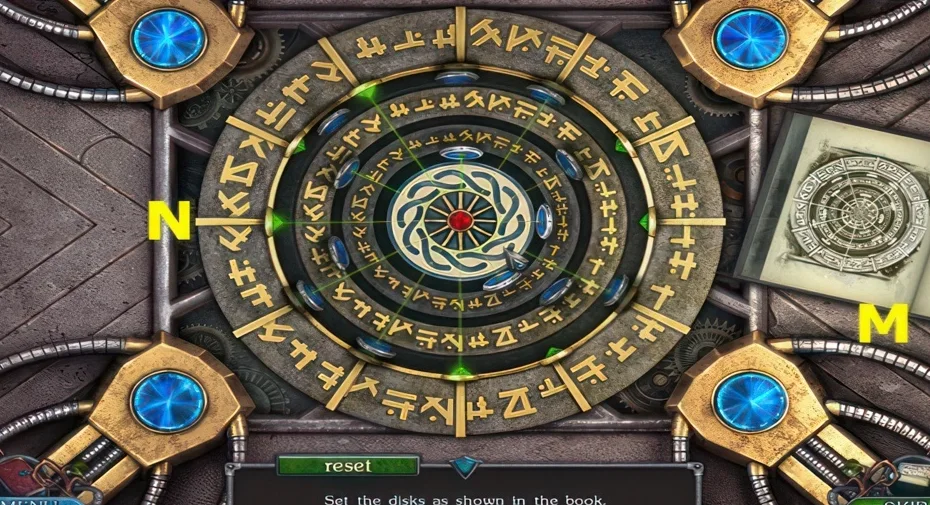
This guide covers the researched puzzle stops. Some connecting exploration and item pickups are still being documented.
Commonly missed
- The elevator can only be fixed with a part the mad miller keeps, and he hands it over only after his griffin nestling is cured with the medicinal ointment.