Legendary Tales 1 Chapter 3 Walkthrough – Groom's Hut
Legendary Tales: Stolen Life · last updated 2026-10-15
Chapter overview and locations
From the city outskirts Lucia trades favours to enter the city unseen, lights the signal fire in the tower and studies the book of the ancients to learn how the resurrection ritual works. She then has a sarcophagus key cast and activated at the altar.
Scenes in this chapter: Groom's hut · City gate and alley · Signal tower · Prison cell · Library of the ancients · Blacksmith's forge · Altar of the ancients · Sarcophagus chamber
Step-by-step walkthrough
Follow the scenes below. Required items and screenshots sit beside each stop; answers expand on request. Select a screenshot to enlarge it.
Jump to a scene · 3 sections
Scene 01
Search the groom's hut
Begin with the dolls and lockpicks. Continue to the petal mechanism with the purple stone.
1Doll line hanging
Where: Groom's hut and yard
You need: Doll (three pieces)
The dolls are hung in the order shown by the drawn line.
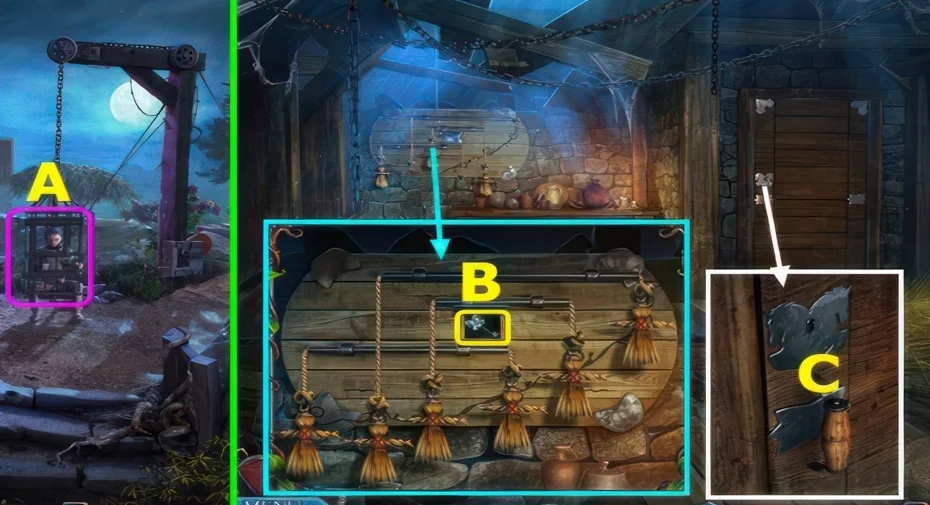
We could not confirm a solution for this one yet, so there is nothing to spoil here.
2Lockpick pair matching
Where: Locked case at the groom's hut
You need: Crowbar · Knife
Every lockpick in the case has a matching twin.
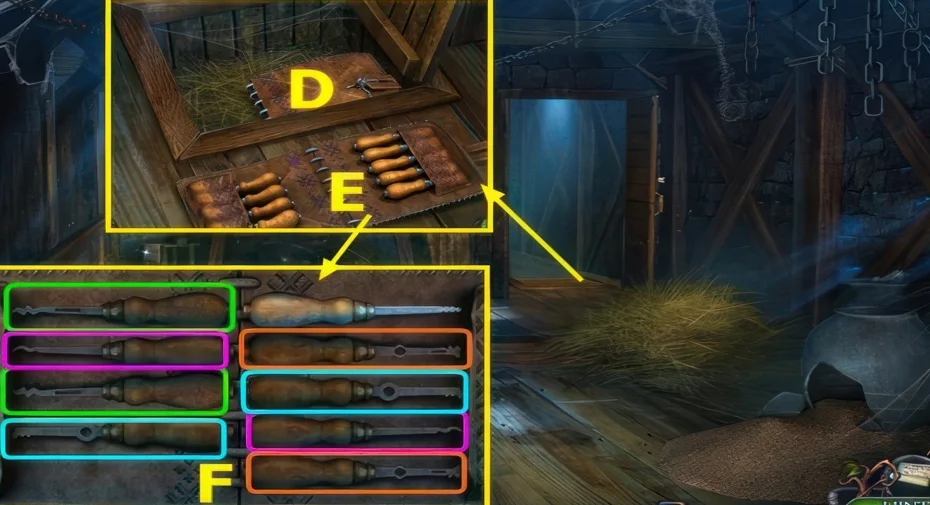
Show the full solution
Open the case with the crowbar and knife, then select matching pairs of lockpicks to obtain one usable lockpick.
3Petal tap and purple stone route
Where: Secret way into the city
You need: Lockpick delivered to the boy
Tap the petals in the right order, then slide the purple piece onto the purple squares by moving silver pieces diagonally.
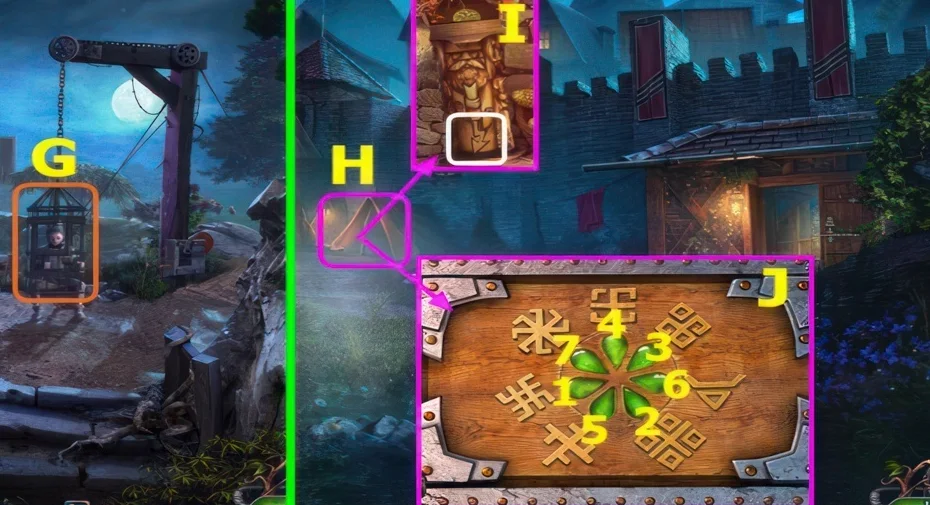
We could not confirm a solution for this one yet, so there is nothing to spoil here.
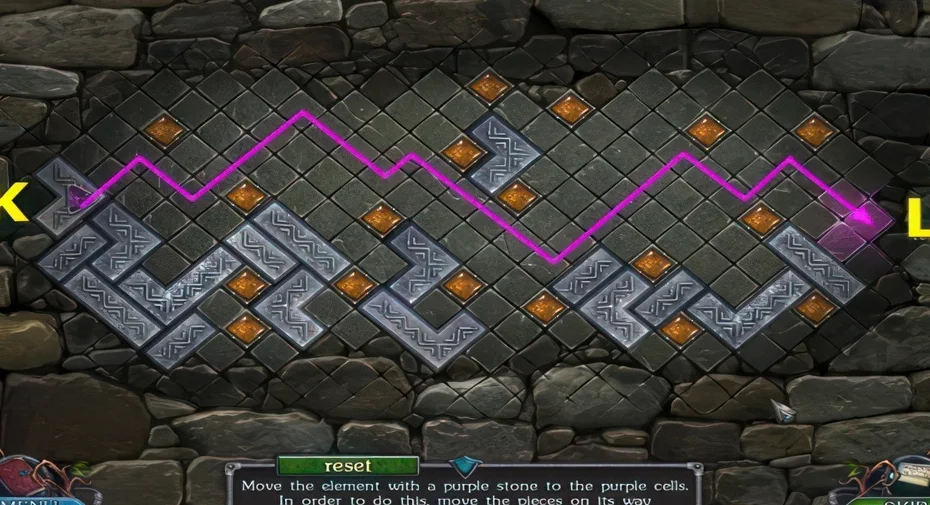
Scene 02
Restore the drawing and gather the tower key
Work through the coloured links and drawing clue while assembling the seven key pieces.
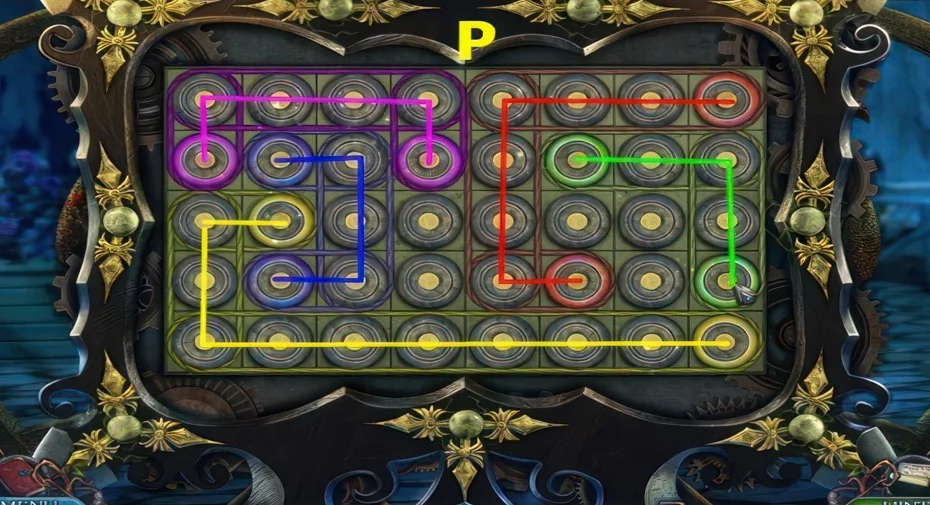
4Colour chain link
Where: City street flower puzzle
You need: Flower · Hammer · Knife
Every colour has to be joined in one unbroken chain.
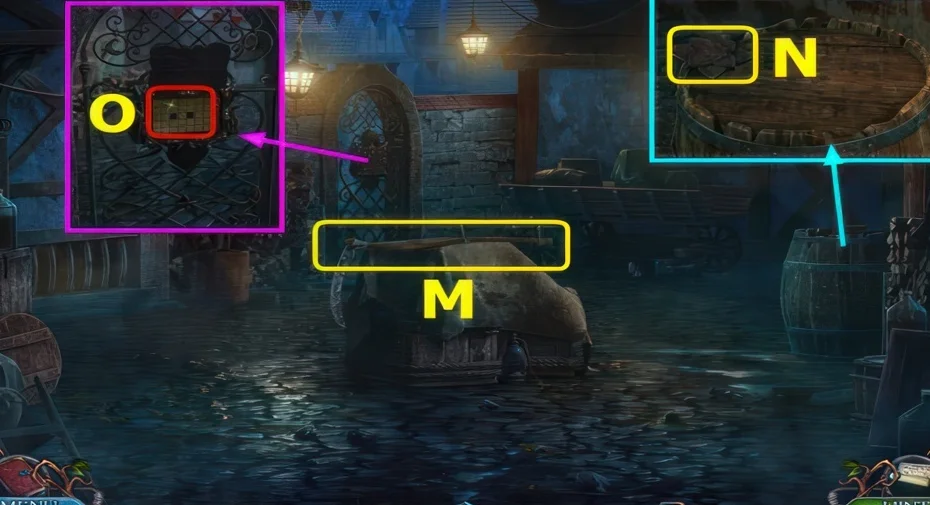
We could not confirm a solution for this one yet, so there is nothing to spoil here.
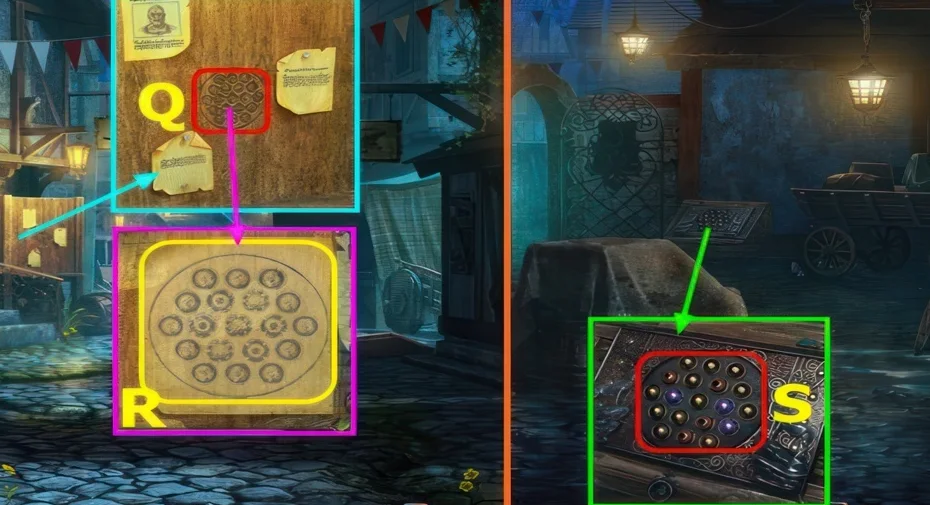
5Hint drawing restoration
Where: Wall drawing reached from the cell area
You need: Paper · Coal
Rubbing coal over paper copies the drawing, and the copy then has to be rebuilt.
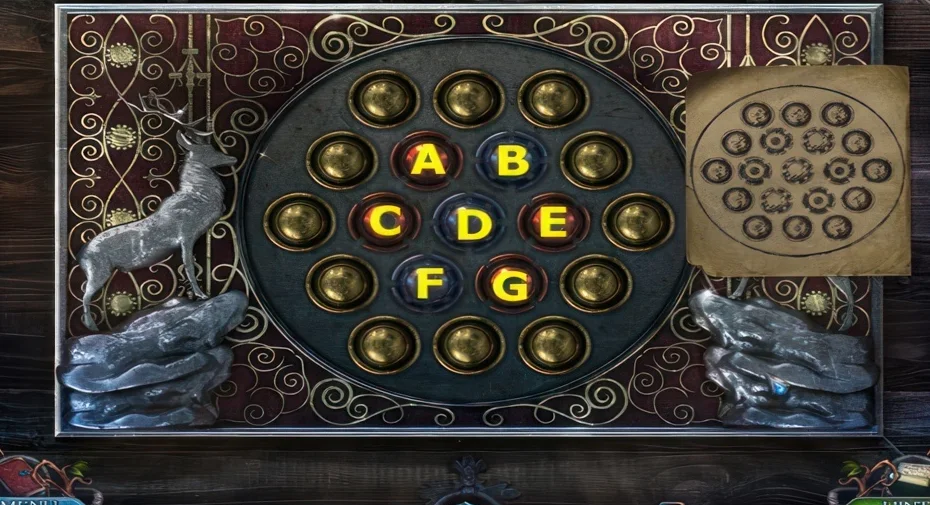
6Seven tower key pieces
Where: City, tower and surrounding rooms
You need: Tower key (seven pieces)
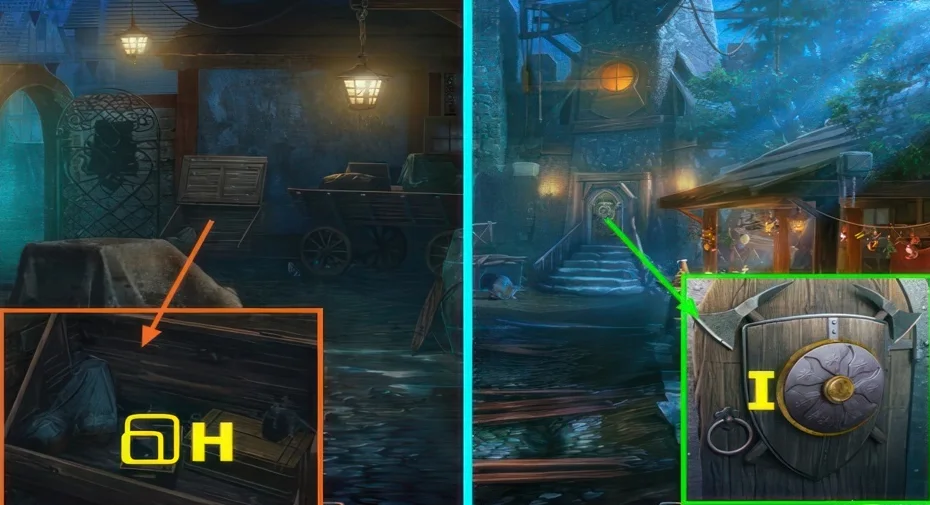
The seven key pieces are scattered across the city scenes.
Show the full solution
Collect all seven tower key pieces and use the assembled key on the tower door.
Scene 03
Read the library and activate the key
Use the book order and rotating blocks before assembling the mould and filling the activation board.
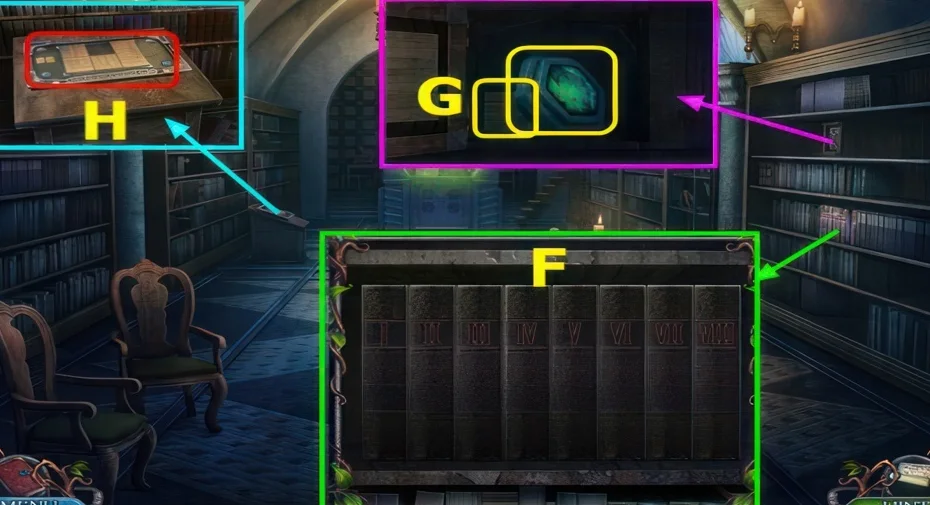
7Books in chronological order
Where: Library of the ancients
You need: Book
The volumes have to sit in date order from left to right.
We could not confirm a solution for this one yet, so there is nothing to spoil here.
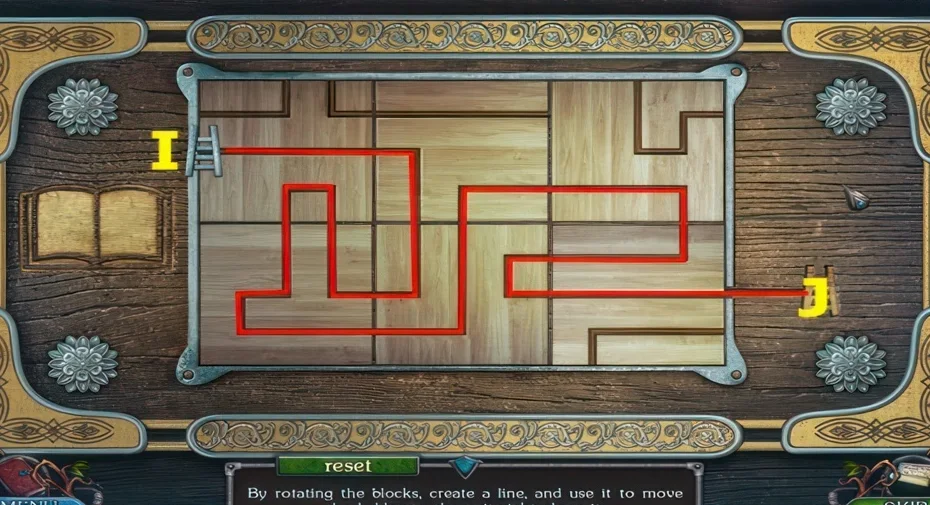
8Rotating blocks ladder line
Where: Library of the ancients
You need: Wooden detail
Rotate the blocks so the ladder has an unbroken line to travel along.
We could not confirm a solution for this one yet, so there is nothing to spoil here.
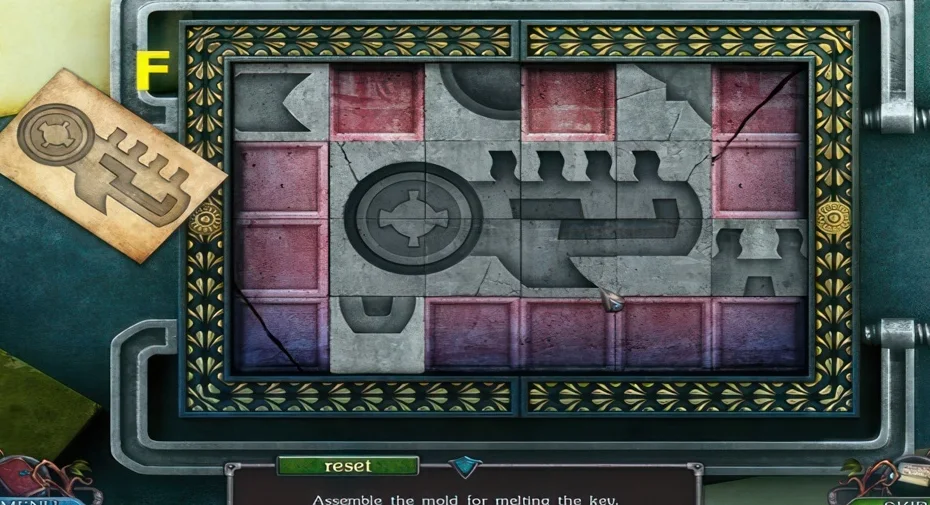
9Key mould assembly
Where: Blacksmith's forge
You need: Key sketch · Bellows
The sketch shows how the mould for the sarcophagus key is put together.
We could not confirm a solution for this one yet, so there is nothing to spoil here.
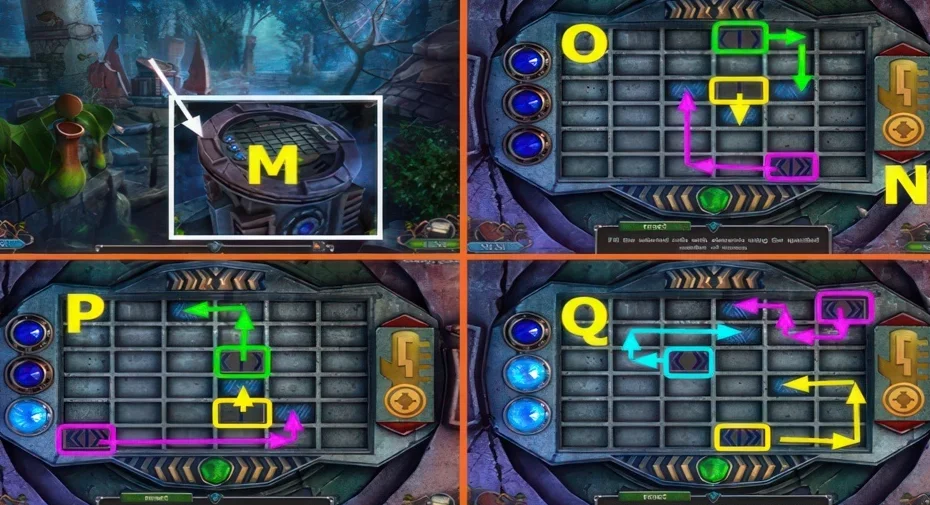
10Key activation cell fill
Where: Altar of the ancients
You need: Key · Bellows · Fire resistant glove · Hammer
Fill the marked cells using exactly the number of moves allowed.
We could not confirm a solution for this one yet, so there is nothing to spoil here.
This guide covers the researched puzzle stops. Some connecting exploration and item pickups are still being documented.
Additional puzzle notes
These earlier notes are kept for reference. Their exact place in the route has not been confirmed, so they are not numbered as walkthrough steps.
Book order for the bird picture
Where: Tower library
You need: Book
Hint 1
Reordering the books rebuilds a hidden picture of a bird.
We could not confirm a solution for this one yet, so there is nothing to spoil here.
Commonly missed
- An unanswered player question asks how to finish the puzzle that yields the wolf picture.
- An unanswered player question asks how to rotate the drawing puzzle disc.