Legendary Tales 1 Chapter 2 Walkthrough – Pirate Ship
Legendary Tales: Stolen Life · last updated 2026-10-15
Chapter overview and locations
The ingredient hunt moves through a swamp to an abandoned pirate ship and then to a lighthouse whose beacon has to be rebuilt. Lucia brews the restoration potion, takes it to Egil, uses his runes to slip towards the city and is stopped by a caged boy who wants water.
Scenes in this chapter: Swamp crossing · Abandoned pirate ship deck and hold · Lighthouse island · Beacon tower · Egil's home · Gate marked with runes · City outskirts · Cage holding the boy
Step-by-step walkthrough
Follow the scenes below. Required items and screenshots sit beside each stop; answers expand on request. Select a screenshot to enlarge it.
Jump to a scene · 3 sections
Scene 01
Repair the ship and cross the swamp
Repair the steering wheel before following the route into the swamp. The next stops concern the beacon and lighthouse.
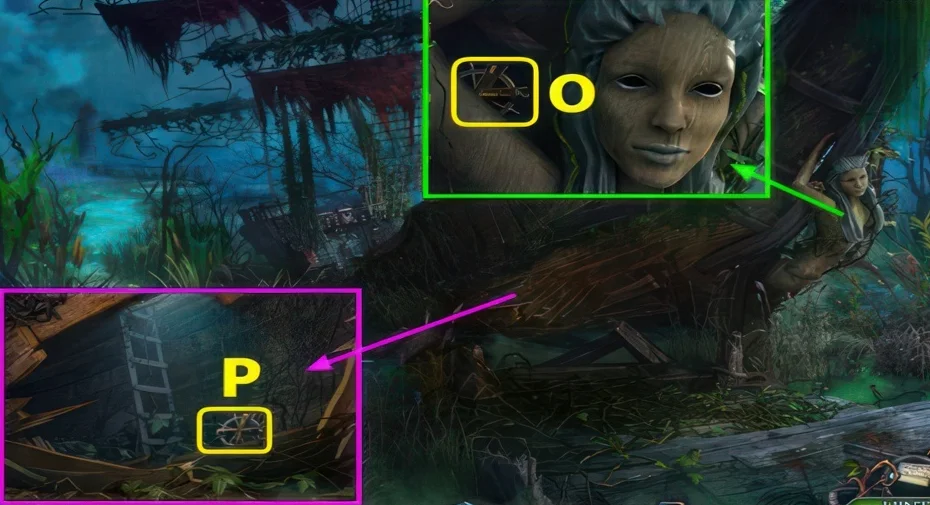
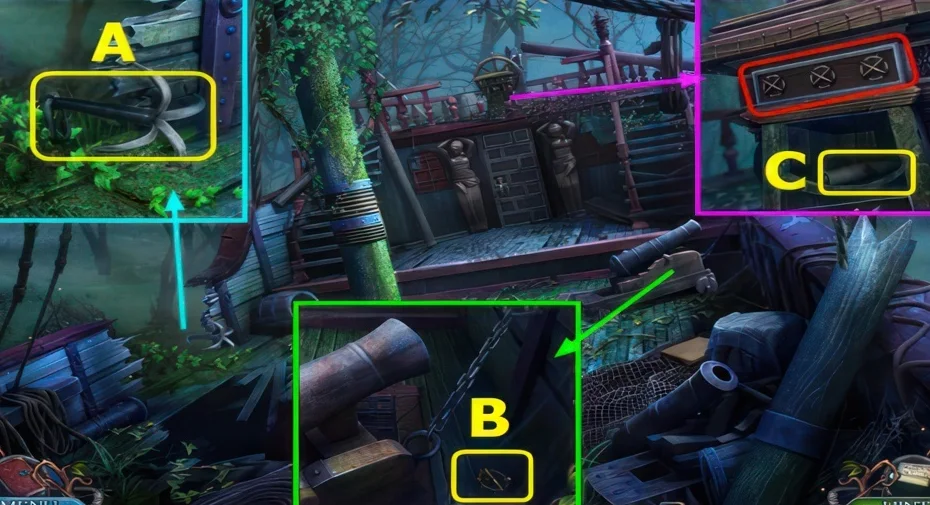
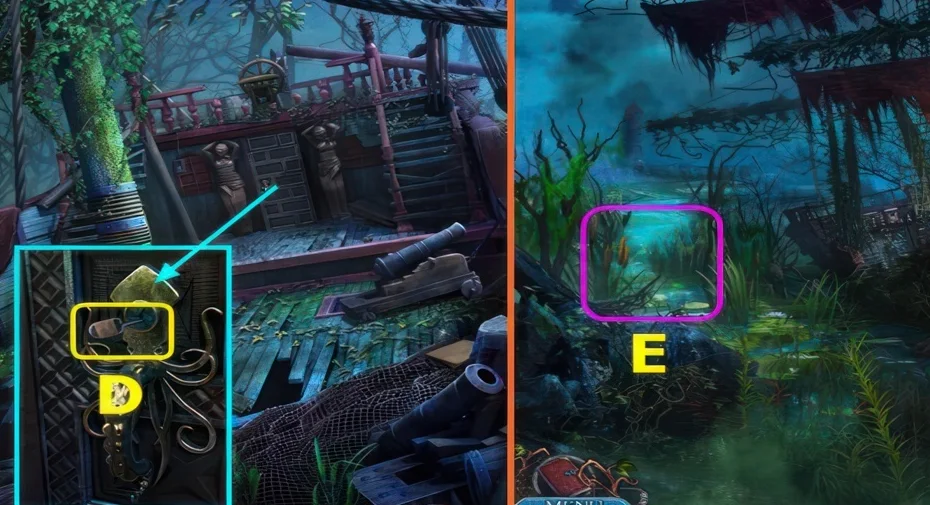
1Steering wheel repair
Where: Deck of the abandoned pirate ship
You need: Steering wheel part (three pieces) · Hammer
One part is loose while the others are blocked by obstacles on the deck.
2Swamp route
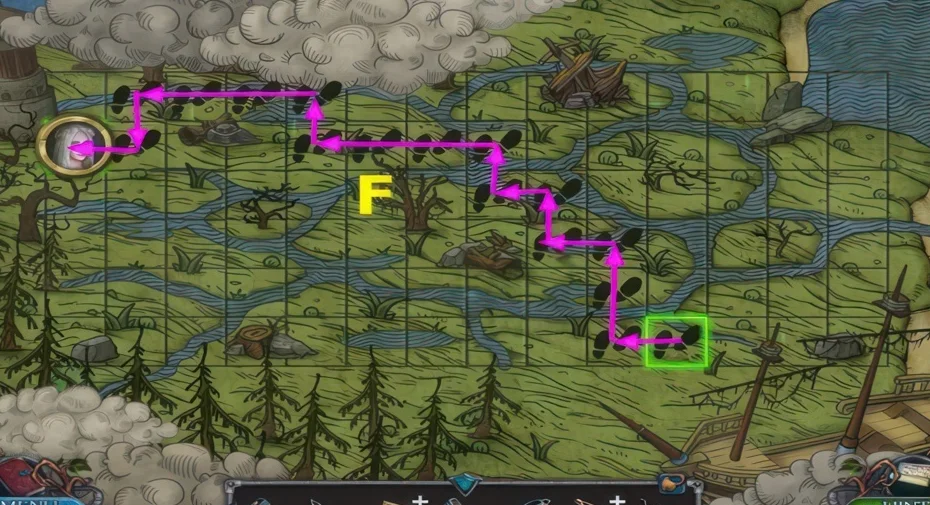
Where: Swamp between the ship and the lighthouse
You need: Swamp map
Only certain squares can be stepped on to reach the lighthouse.
We could not confirm a solution for this one yet, so there is nothing to spoil here.
Scene 02
Restore the beacon and open the lighthouse
Keep the beacon parts, element clue and lighthouse locks separate: each belongs to a different interaction.
3Beacon rebuild
Where: Lighthouse lantern room
You need: Part of the mechanism · Matches
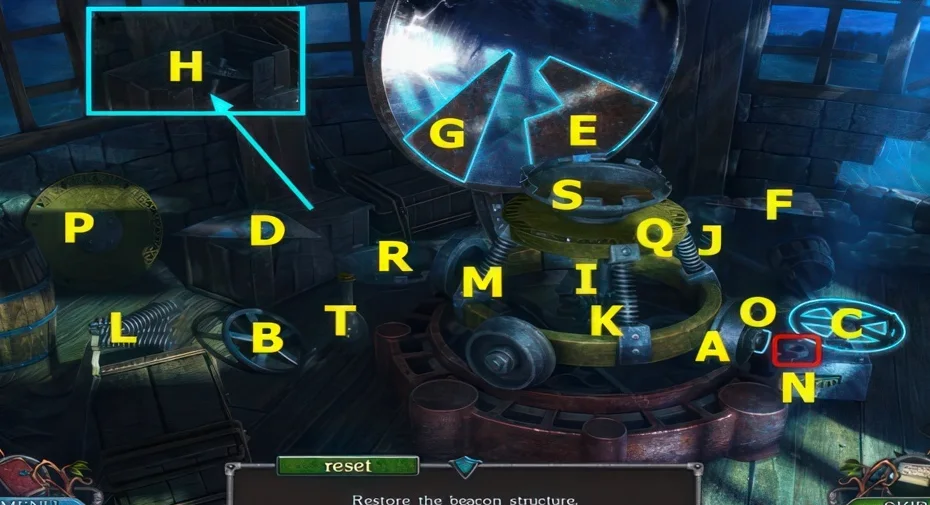
The beacon frame is reassembled before it can be lit.
Show the full solution
Place the mechanism part, make the moves (B-C)-(D-E)-(F-G), open the crate and use (H-I), then (J-K)-(L-M)-(N-O)-(P-Q)-(R-S) and finally light it with the matches.
4Element ordering by natural force
Where: Puzzle below the beacon in the lighthouse
You need: Element pieces
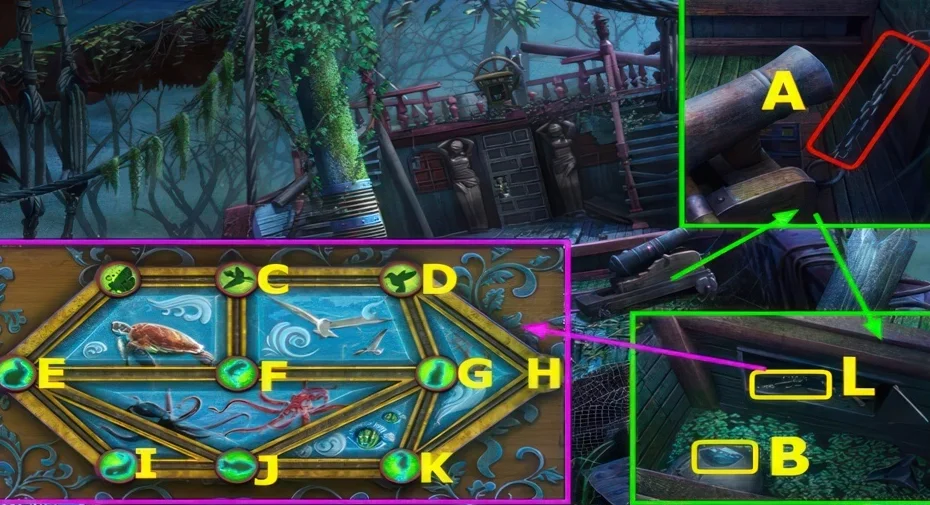
Each element belongs with the natural force it represents.
5Lighthouse triple lock
Where: Upper lighthouse, three linked mini-games
You need: Key · Figurines
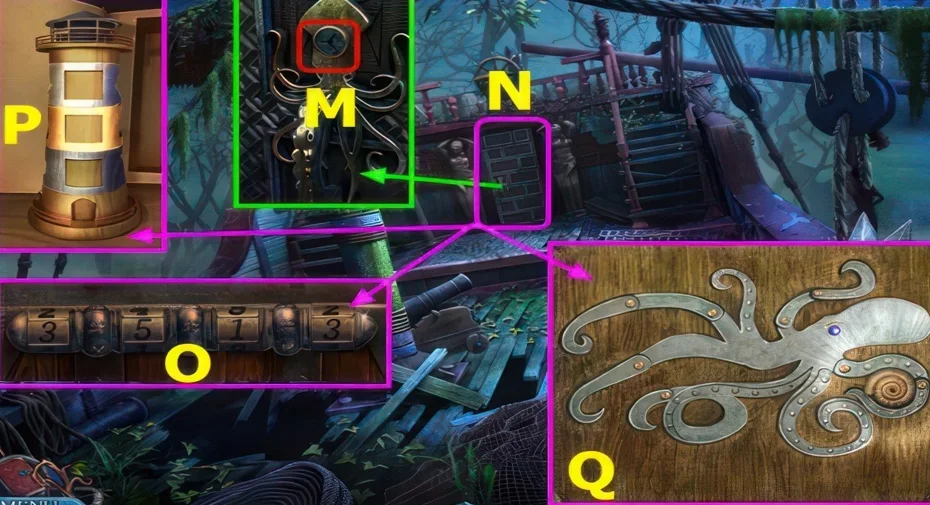
A code already seen, three matching figurines for the lighthouse parts, and octopus tentacles to reset.
We could not confirm a solution for this one yet, so there is nothing to spoil here.
Scene 03
Finish the constellation and cage route
Use the star clue at the constellation board, then deal with the cage mechanism and the water bottle.
6Constellation dot puzzle
Where: City outskirts, wall picture near the cage
You need: Grapple hook
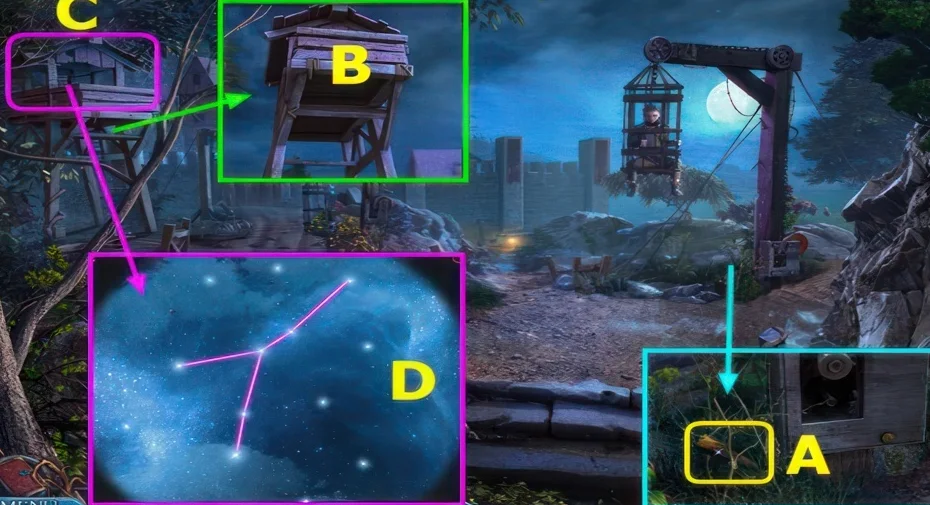
Join the dots to copy the constellation shown in the picture.
We could not confirm a solution for this one yet, so there is nothing to spoil here.
7Cage winch mechanism
Where: Cage where the boy is held
You need: Crowbar · Hammer · Gear
The winch that raises the cage is missing its gear.
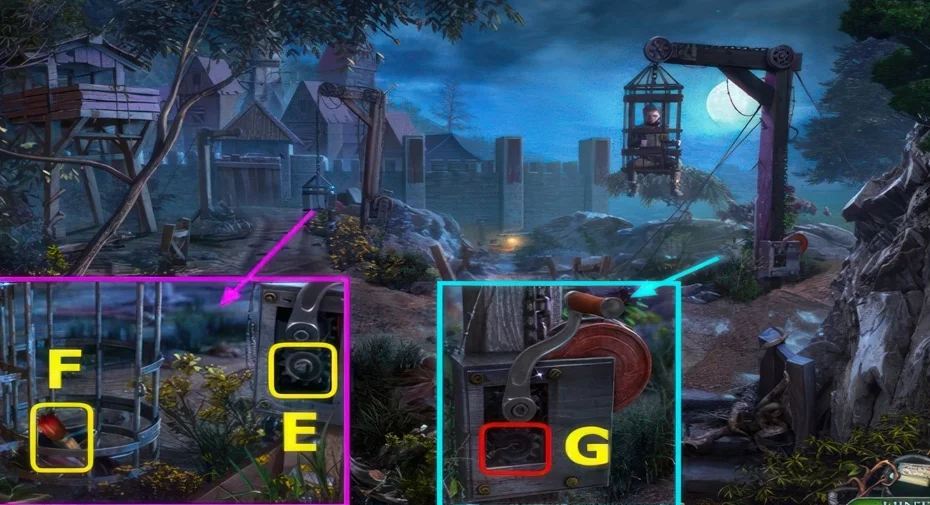
Show the full solution
Free the gear with the crowbar and hammer, place the gear and pull the lever to lift the cage.
8Water bottle assembly
Where: Workshop by the cage
You need: Bottle · Cloth · Bowl of dirty water · Funnel
A filter has to be built from four separate items.
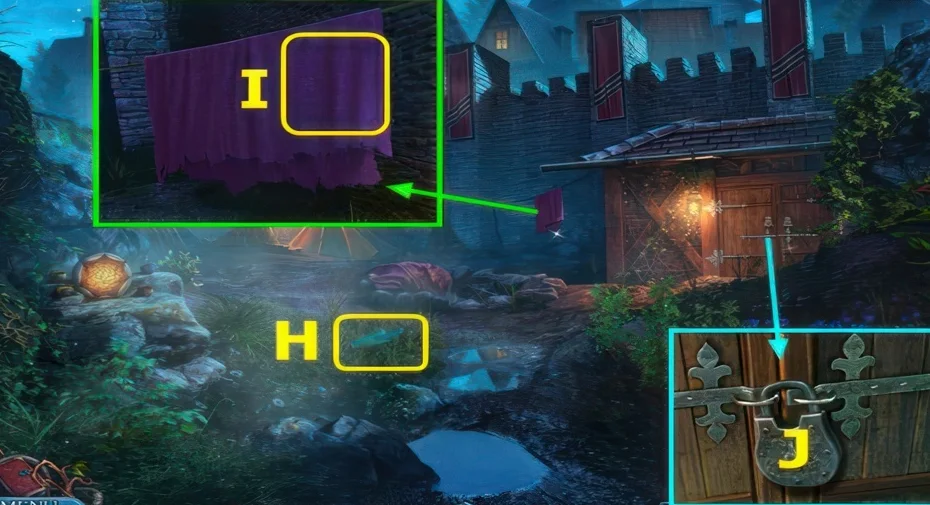
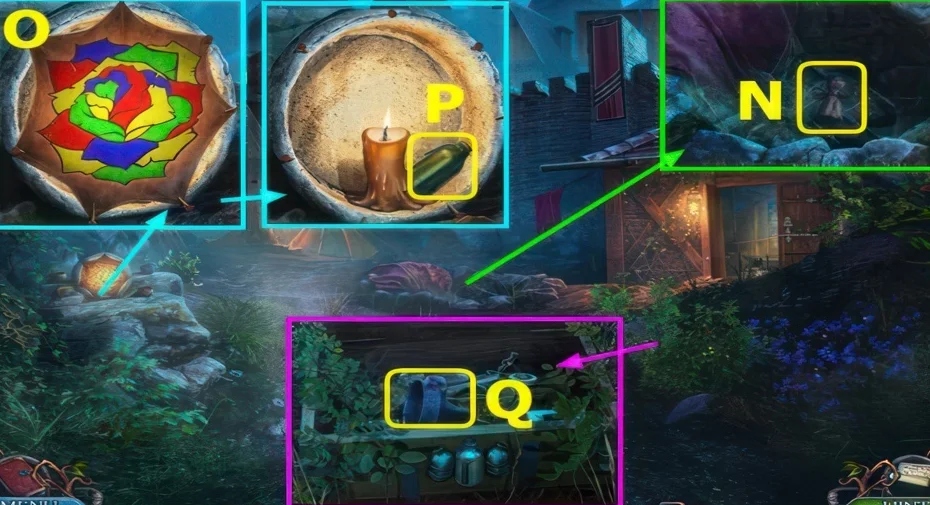
This guide covers the researched puzzle stops. Some connecting exploration and item pickups are still being documented.
Commonly missed
- An unanswered player question asks where the pinecone can be found; the asker places it in chapter 2, though the source numbering may differ from this chapter order.