Legendary Tales 1 Chapter 1 Walkthrough – The Yard of the Tavern
Legendary Tales: Stolen Life · last updated 2026-10-15
Chapter overview and locations
Lucia saddles her horse and follows the wagon that took Ulf towards the witch forest. On the way she frees a boy trapped in a pit, is led to a druid who knows the forest, and builds a protective torch so she can pass the creepers.
Scenes in this chapter: Tavern yard · Farm gate and well · Tavern cellar · Witch forest path · Pit with the trapped kid · Druid's house · Creeper barrier
Step-by-step walkthrough
Follow the scenes below. Required items and screenshots sit beside each stop; answers expand on request. Select a screenshot to enlarge it.
Jump to a scene · 3 sections
Scene 01
Open the farm and tavern
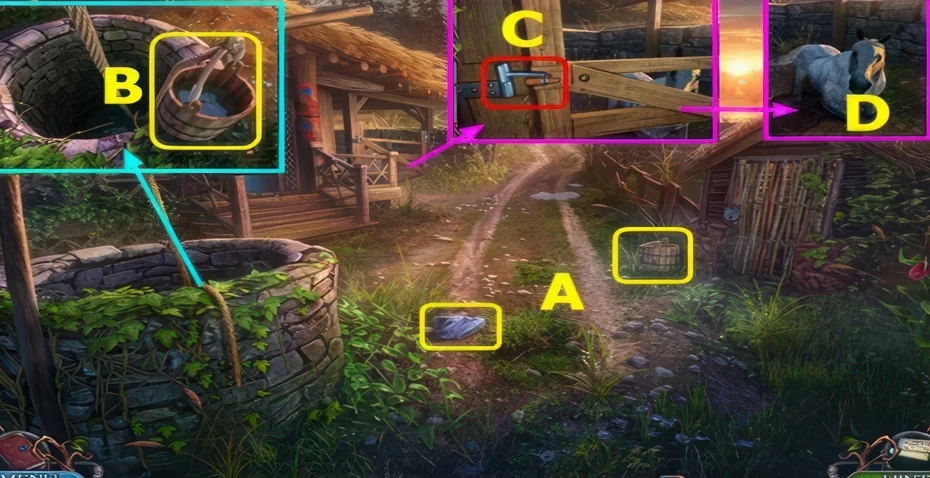
Start at the farm gate, then inspect the tavern entrance. Keep the objects you collect here for the locks inside.
1Farm gate opener
Where: Gate at the tavern yard
You need: Stone · Bucket of water
Two separate objects lying in the yard are used on the gate.
Show the full solution
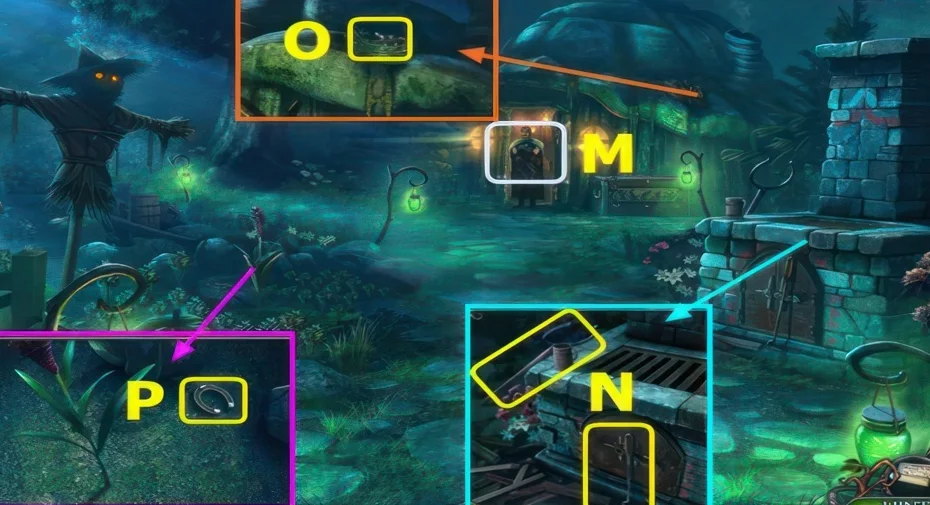
Use the stone on the gate, then pour the bucket of water over it to open the way.
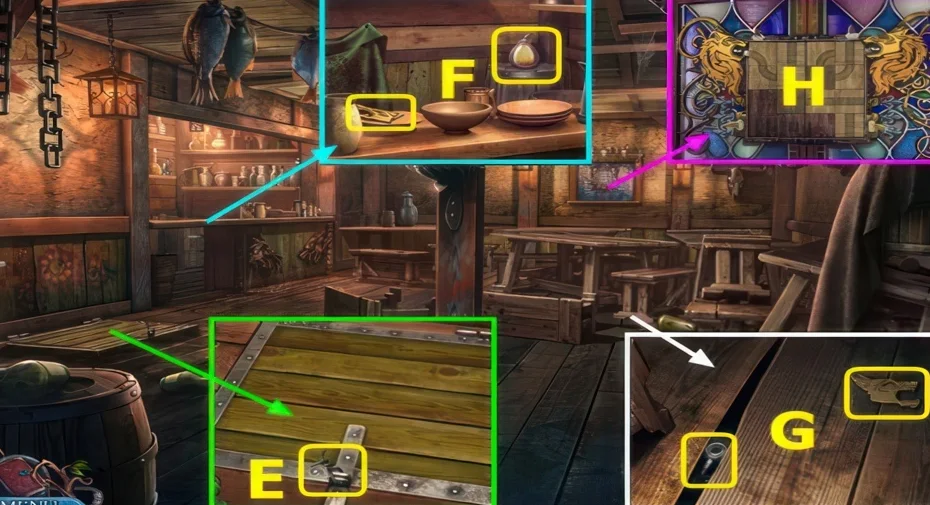
2Tavern door lock
Where: Door on the tavern yard
You need: Wire
The key sits too far away to reach with a hand.
Show the full solution
Reshape the wire into a hook by selecting it repeatedly, hook out the key and use it on the door.
Scene 02
Search the tavern and prepare the horse
Work through the wolf-head mechanism and the cellar before finishing the horse equipment.
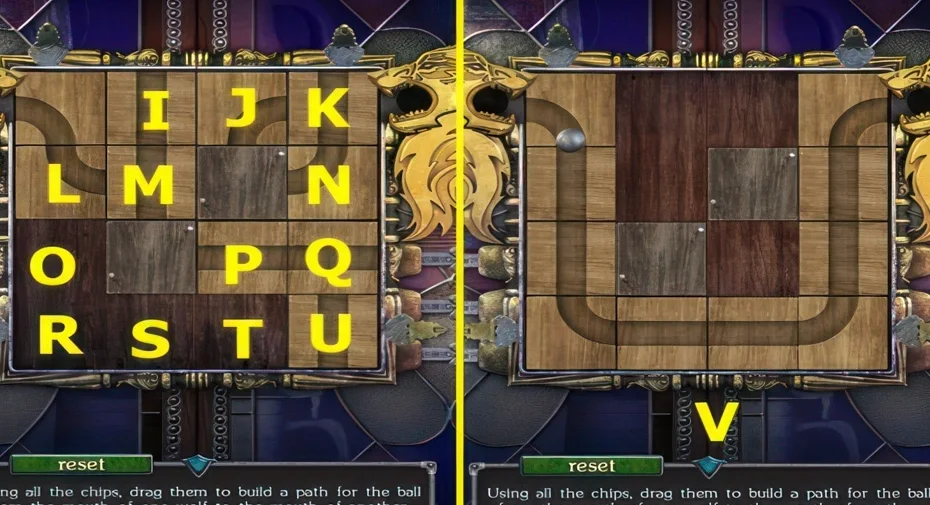
3Two wolf heads marble run
Where: Relief with two wolf heads in the tavern cellar
You need: Wolf figurine (two pieces)
Drag the chips so the ball rolls from one wolf's mouth into the other's.
Show the full solution
Part one (L-R)-(M-O)-(I-L)-(P-S)-(U-P)-(Q-T)-(N-U)-(P-Q)-(K-N)-(J-K); part two (I-C)-(H-F)-(J-H)-(E-J)-(D-E)-(A-G)-(E-D)-(B-A); part three (S-X)-(T-W)-(Q-S)-(O-T)-(N-Q)-(M-O)-(L-N)-(P-L) then (R-P)-(U-R)-(V-U)-(W-V)-(S-W)-(T-S)-(Q-T)-(O-Q)-(N-O).
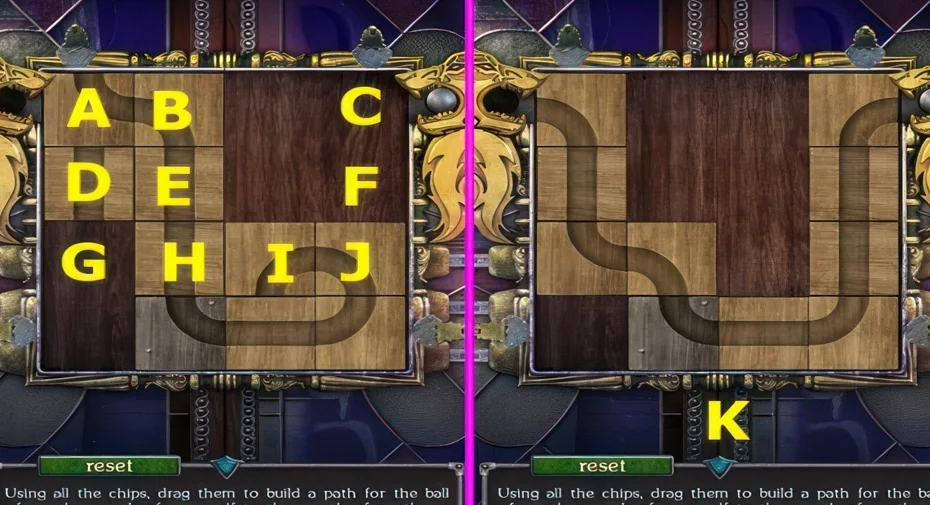
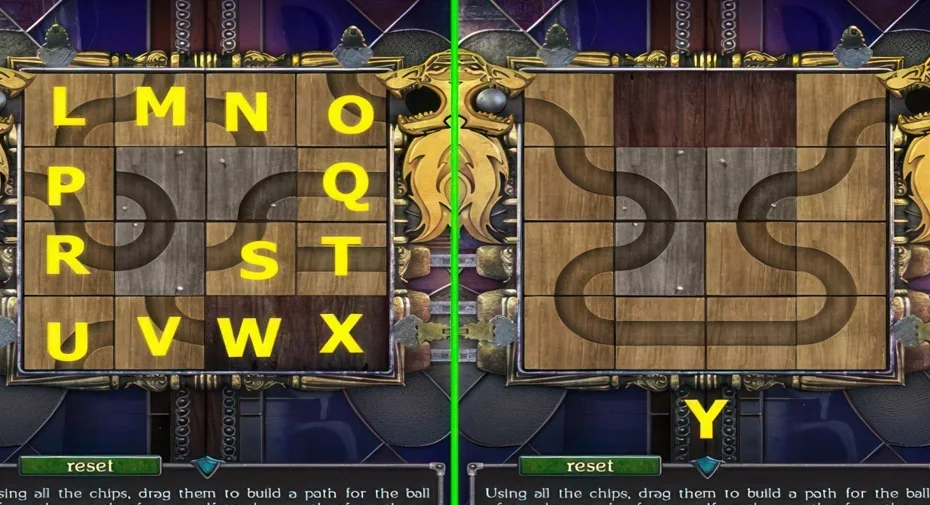
Variants: Solved as three consecutive parts.
4Cellar trap-door chip path
Where: Trap door under the tavern
You need: Ladder · Lit oil lamp
The oil lamp has to be filled with the oiler and lit before going down.
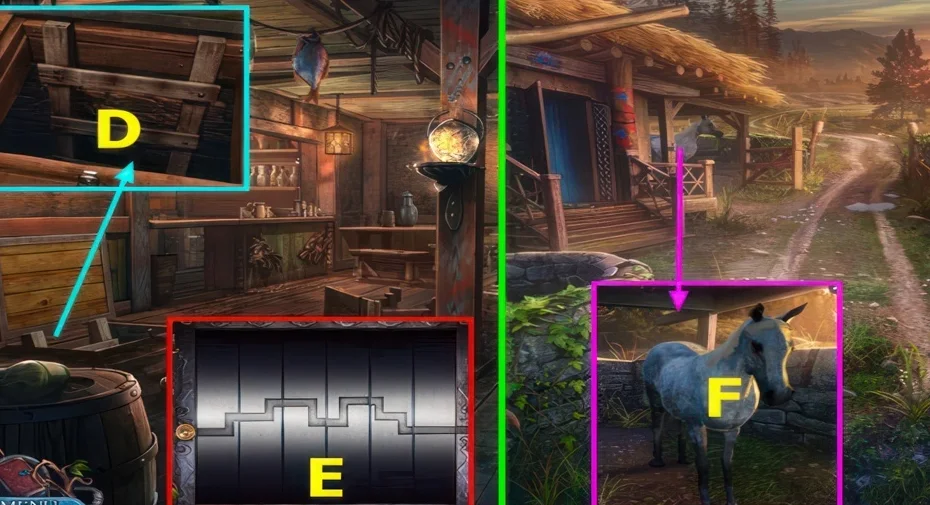
We could not confirm a solution for this one yet, so there is nothing to spoil here.
5Horse equipment saddle-up
Where: Horse beside the tavern
You need: Horse equipment (two pieces)
The two halves of the horse gear sit behind different locks.
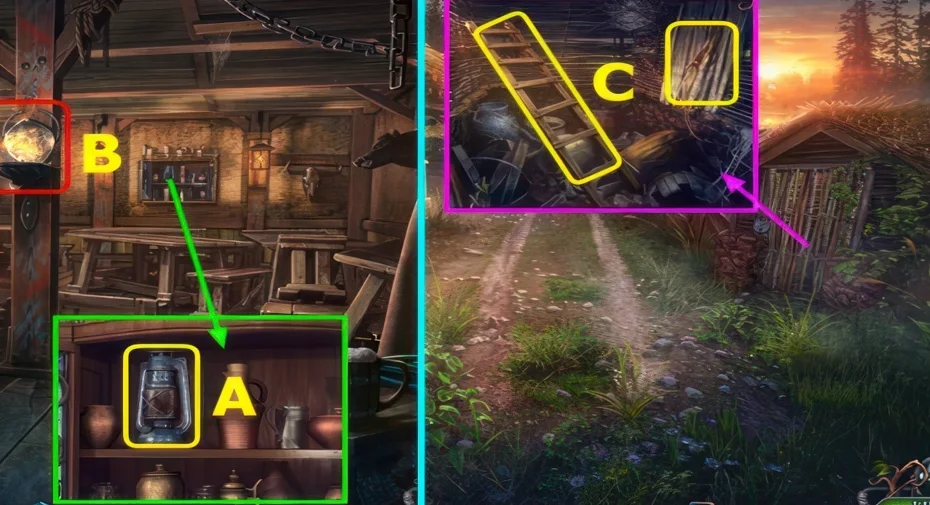
Scene 03
Follow the rune and chip clues
Carry the rune disk and chips forward. Match each clue to its own mechanism before leaving this part of the route.
6Runic disk sign
Where: Forest stone bearing the rune sign on the way to the druid
You need: Runic stone (four pieces)
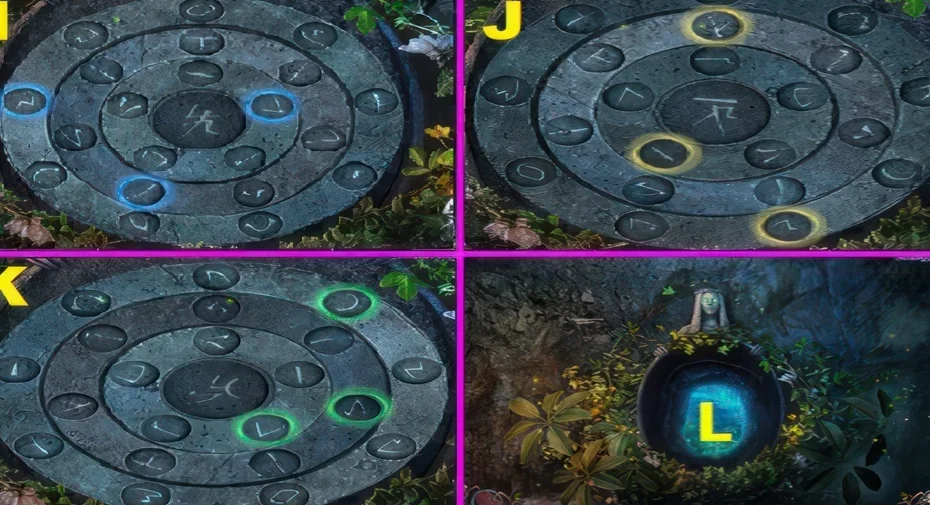
Turn the disks so the runes forming the sign on the central stone land in the lit circles.
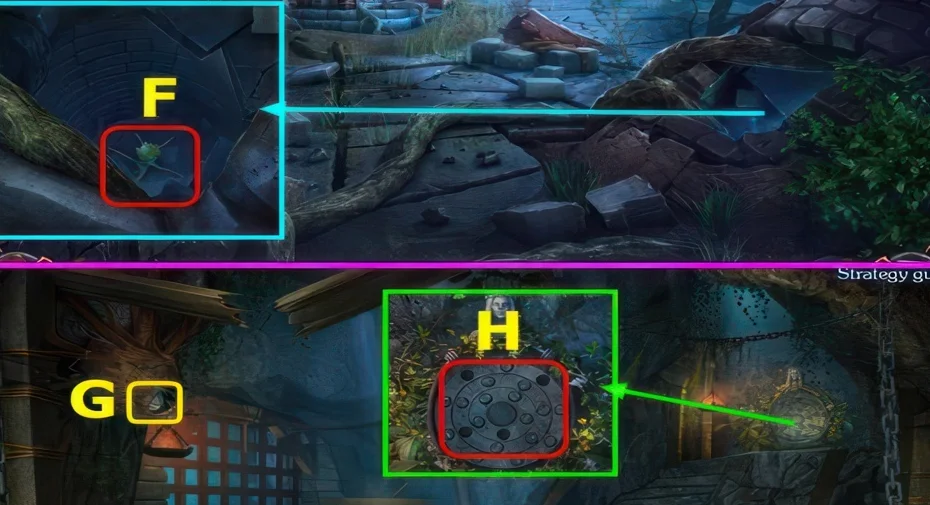
We could not confirm a solution for this one yet, so there is nothing to spoil here.
7Button-move chip box
Where: Box released by the little horseshoe
You need: Little horseshoe
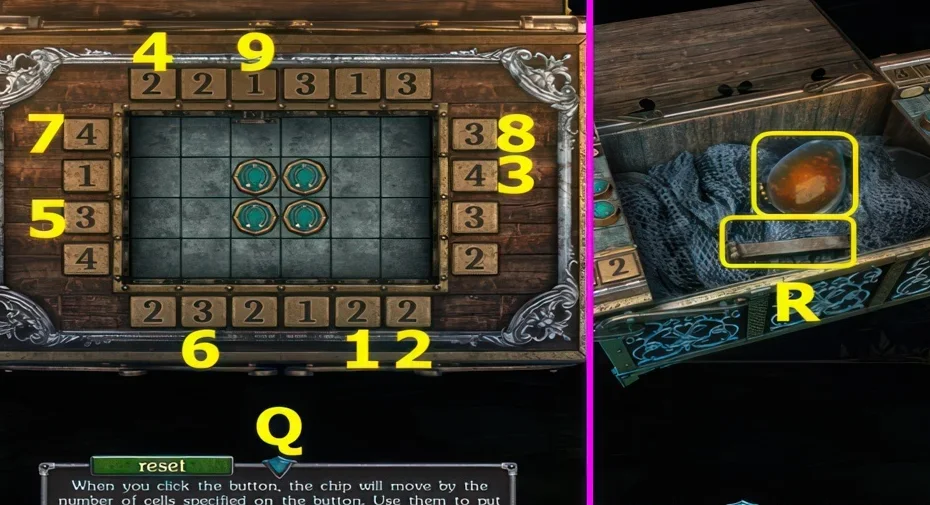
Each button shifts the chip by the number of squares printed on it.
We could not confirm a solution for this one yet, so there is nothing to spoil here.
This guide covers the researched puzzle stops. Some connecting exploration and item pickups are still being documented.
Commonly missed
- The silver box picked up early only opens with a horseshoe found much later, so it sits in the inventory for a long time.
- A second object that looks like a silver box is really a hammer head, and its handle also turns up much later.
- An unanswered player question asks how to get rid of the snake in the cellar.