Legendary Tales 3 Chapter 6 Walkthrough – The Captain of the Ship
Legendary Tales: Stories · bonus story · last updated 2026-10-15
Chapter overview and locations
A tough mercenary and ship captain is sent to an island to capture a mysterious huge creature, described in the source as an old lady turtle that can only be summoned with a lost horn. He explores the wrecked ship, the island shore and a temple hall, gathering boards, stones and gears. The game finishes with a large mosaic lock in the temple.
Scenes in this chapter: Ship deck and beach with shipwreck timber · Island shore with blue-leafed trees and stone markers · Temple hall with warrior statues and a large mosaic lock
Step-by-step walkthrough
Follow the scenes below. Required items and screenshots sit beside each stop; answers expand on request. Select a screenshot to enlarge it.
Jump to a scene · 3 sections
Scene 01
Repair the ship route and stone pillars
Recover the nails and hammer, then complete the blue stone, disk and red stone mechanisms.
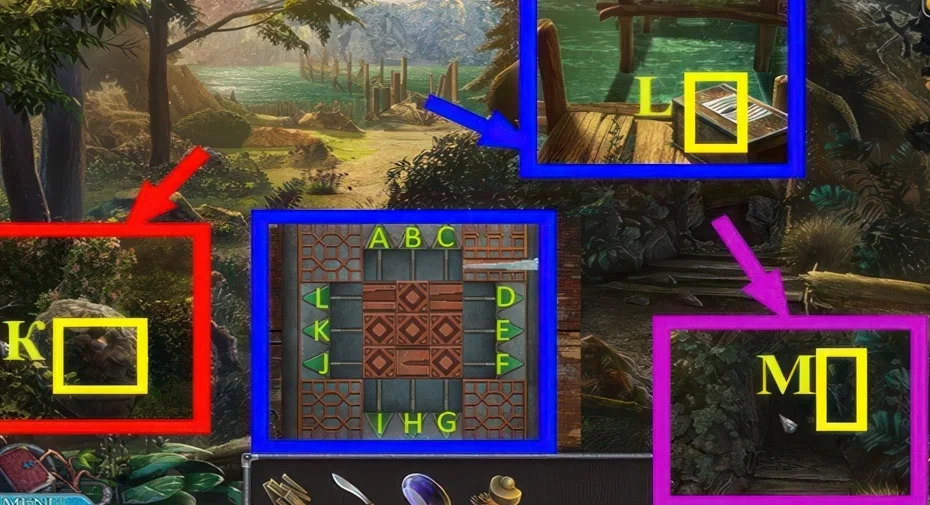
1Lock puzzle that yields the nails and hammer
Where: Chapter 6, marker L
Complete the opening lock to recover the nails and hammer.
Show the full solution
B, I, E, H, F, K, J, A, F, L, H, B, D, C, H, K, B, E, G, G, K, H, E, then E, J, K, B, C, H, A, E, B, K, I, I, J, A, B, K, L, A, D, E, I, H, F, I, K, A, E, C, B, A.
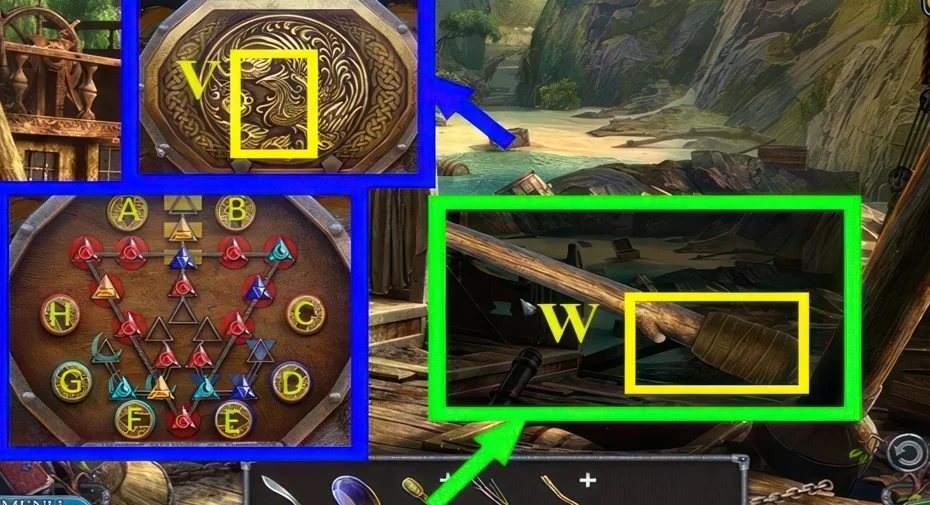
2Blue stone puzzle
Where: Chapter 6, marker V, after oiling the mechanism
You need: Blue stones 4/4
Use the blue stone on its matching board.
Show the full solution
H, H, F, E, H, B, H, H, which yields the matches and a hint.
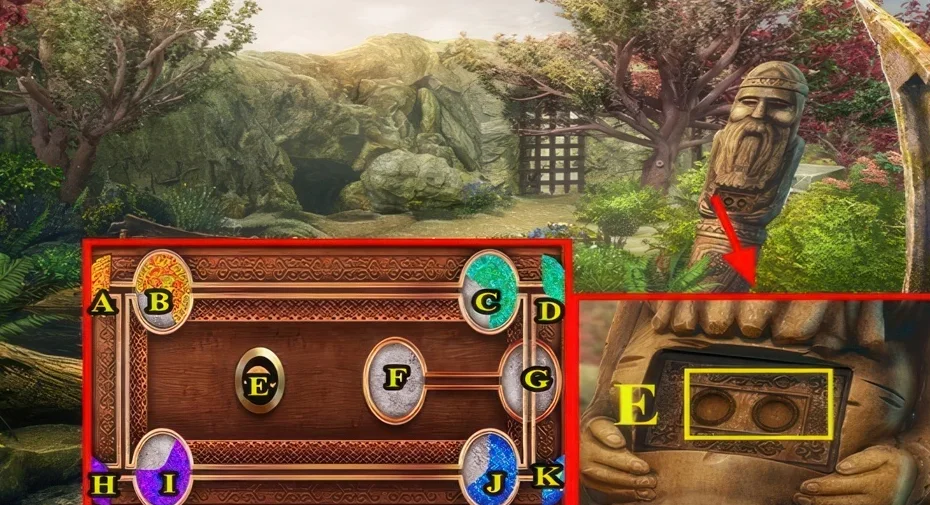
3Disk pattern puzzle
Where: Chapter 6, marker E, using both patterned disks
You need: Disk with a pattern 1/2 · Disk with a pattern 2/2
Compare the disk pattern with the clue before setting the mechanism.
Show the full solution
J-F, E, E, F-J, K, C-F, E, E, F-C, D, J-G, I-J, B-I, C-B, G-C, J-F, then E, E, E, I-J, B-I, C-B, F-C, J-F, E, I-J, B-I, C-B, G-C, J-G, I-J, B-I, H, C-B, A, which yields stone 2/2.
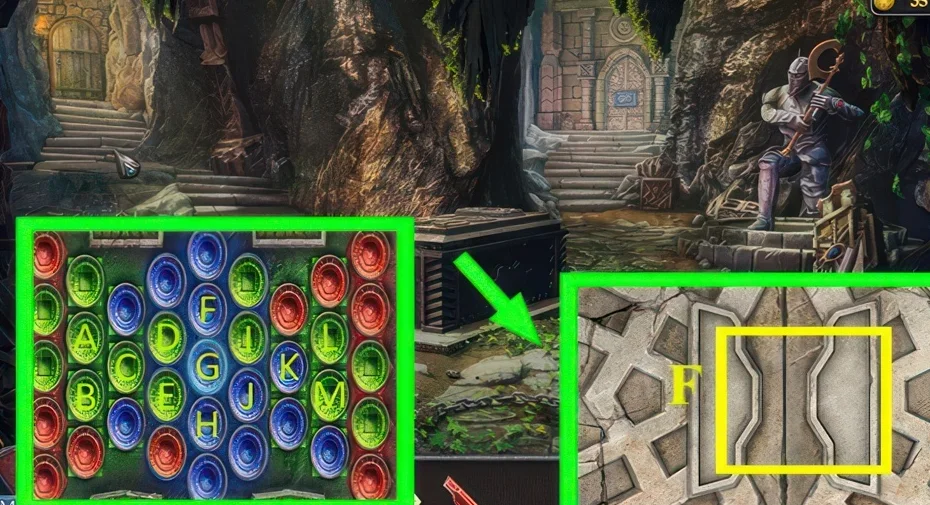
4Red stone pillar puzzle
Where: Chapter 6, marker F, after returning from the cave
You need: Red stones 2/2
Fit the red stone to the pillar.
Show the full solution
E x5, D x5, C x5, H x5, J x5, M x5, K x5, I x5, B x5, A x5, L x5, M x5, which yields pattern part 1/2 and the smoke bomb.
Scene 02
Prepare the air potion and mechanism
Find the recipe and pattern part, brew the air potion and complete the mechanism stages in sequence.
5Puzzle that yields the recipe
Where: Chapter 6, marker H, in the cave
Complete the recipe board and collect the recipe.
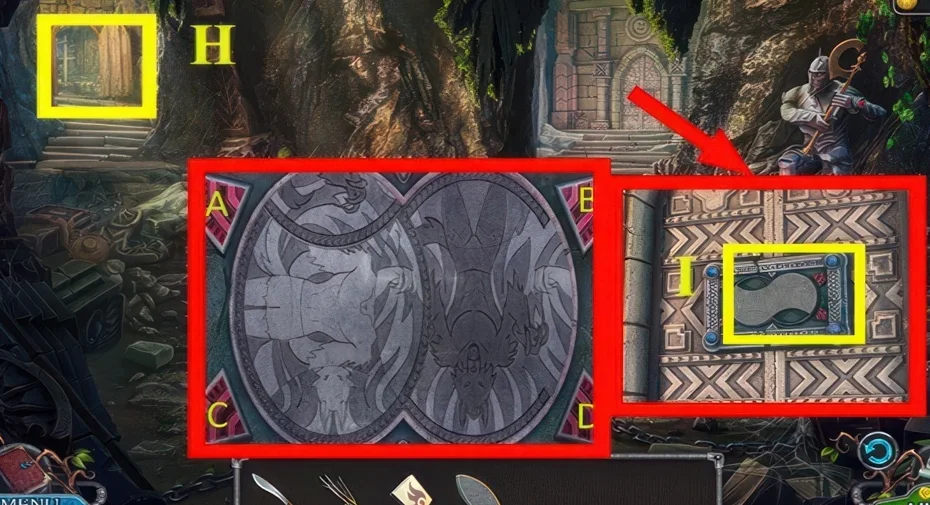
We could not confirm a solution for this one yet, so there is nothing to spoil here.
6Pattern part puzzle
Where: Chapter 6, marker I
You need: Pattern part 2/2
Use the pattern part on its matching mechanism.
Show the full solution
B, A, D, C, B, B, C, D, A, D, C, B, A, B, C.
7Air potion brewing
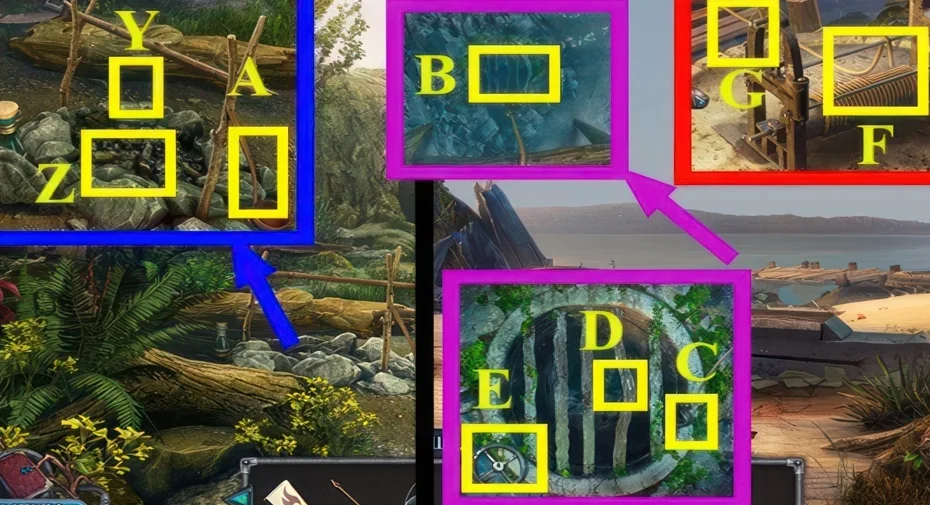
Where: Chapter 6, marker Y, in the beach camp scene
You need: Brushwood 4/4 · Matches · Sand seaweed · Coastal coral · Clay mushroom · Red swamper flower · Wolfberries
Prepare the air potion from the recipe ingredients.
Show the full solution
Mix the ingredients in the pot with water over the fire and press marker A for the air potion.
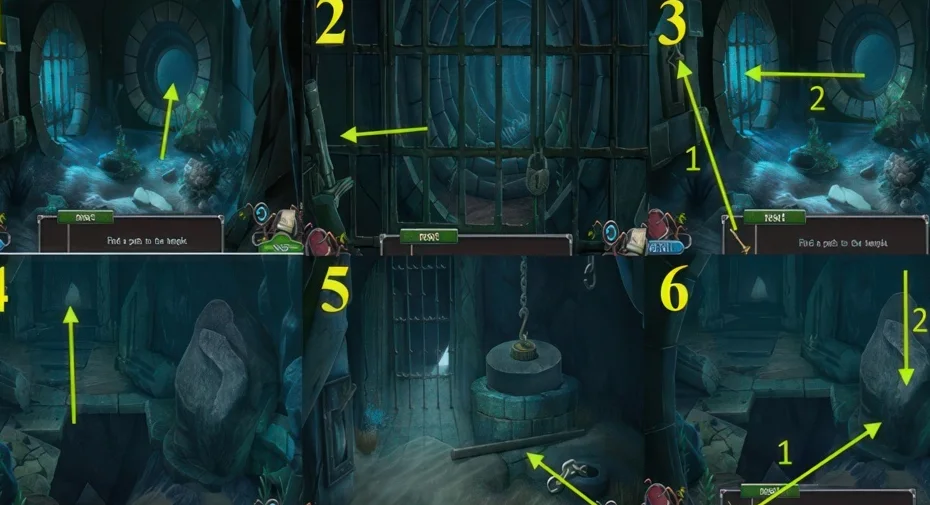
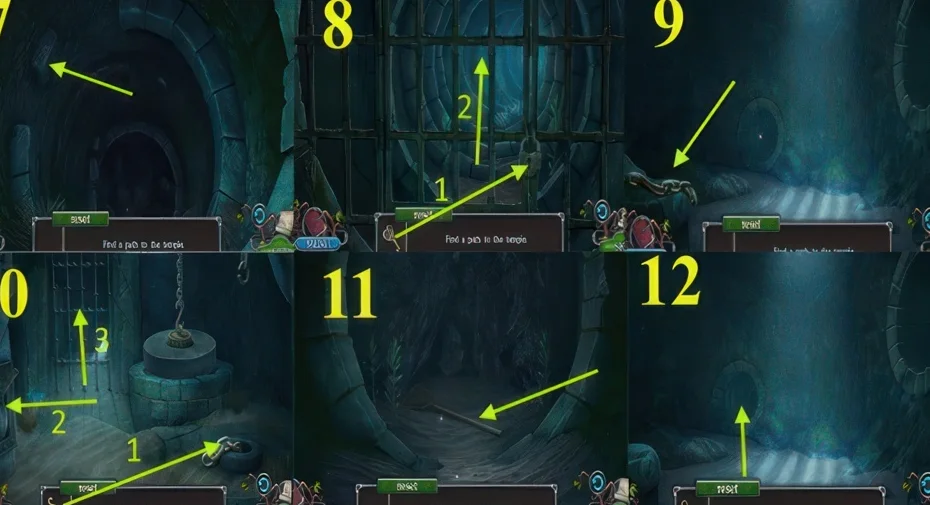
8Four part mechanism puzzle
Where: Chapter 6, marker B, after the air potion
You need: Gears 3/3 · Handle
Complete the four mechanism stages in order.
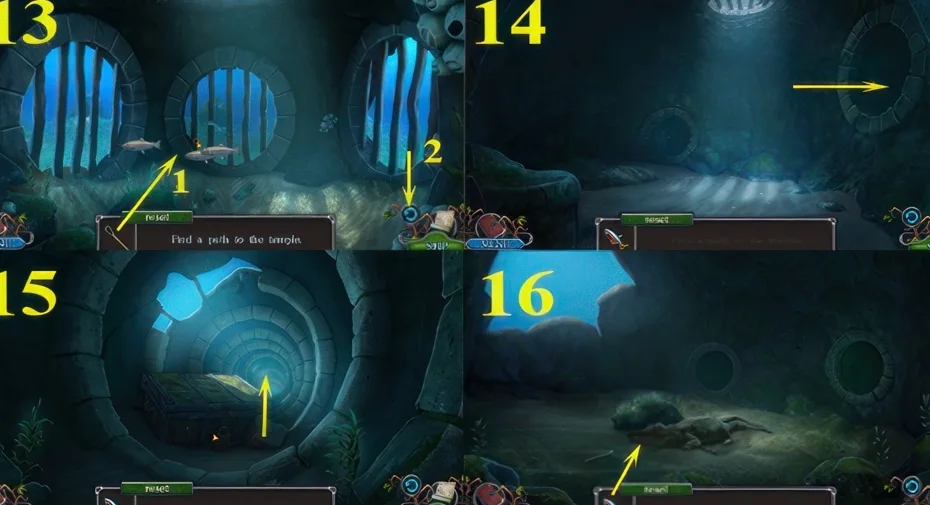
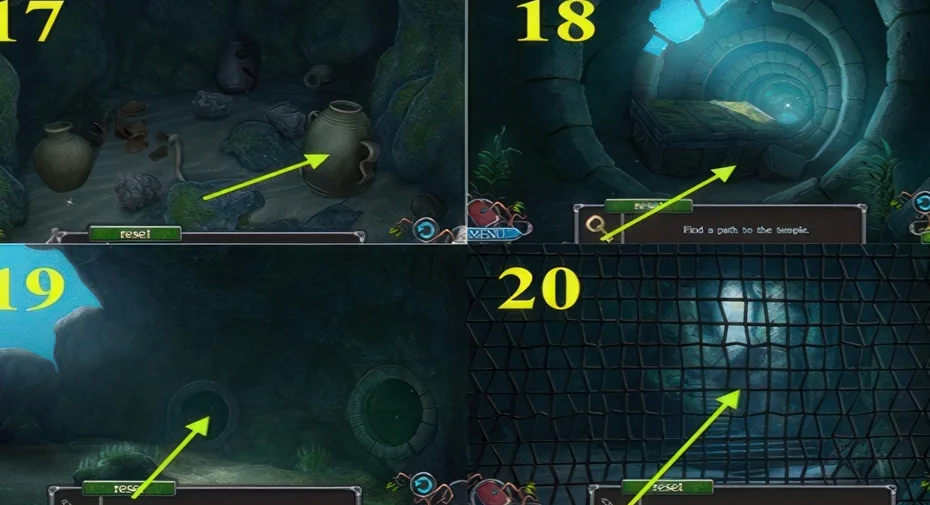
Scene 03
Recover the sword and open the final gate
Recover the sword, use it with the gear at the gate and complete the final mosaic lock.
9Puzzle that yields the sword
Where: Chapter 6, marker K, after using the key
You need: Key
Use the key and complete the scene that yields the sword.
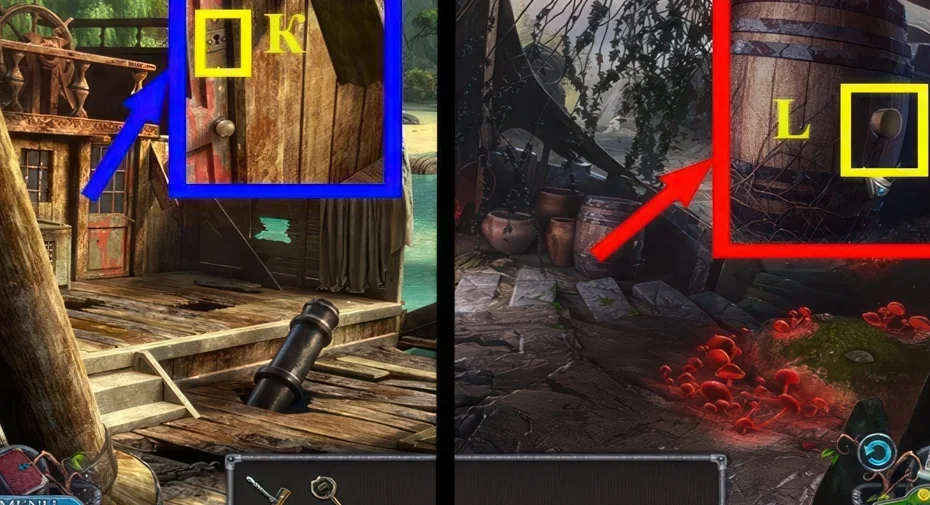
We could not confirm a solution for this one yet, so there is nothing to spoil here.
10Gear and sword gate puzzle
Where: Chapter 6, markers N and Q in the temple approach
You need: Sword · Axe
Use the sword and axe at the gate, then complete its mechanism.
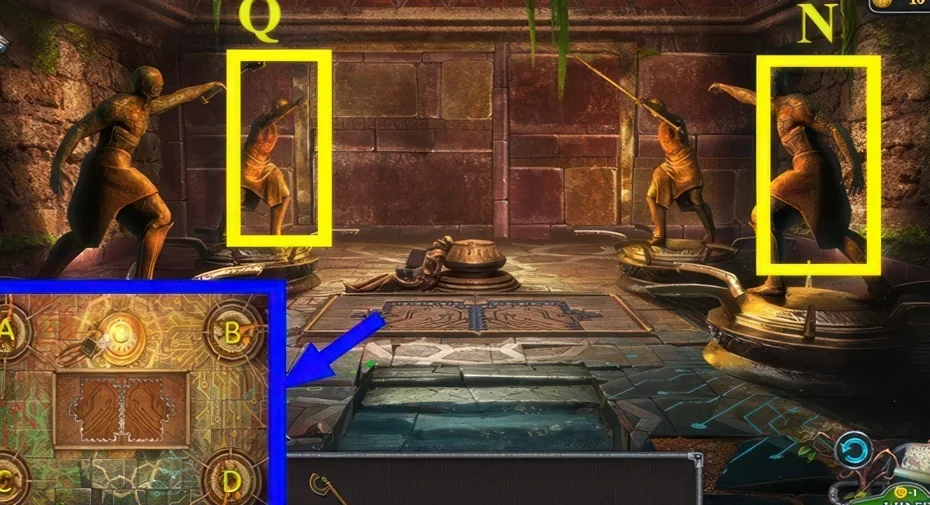
Show the full solution
B, B, A, A, C, C, D, D.
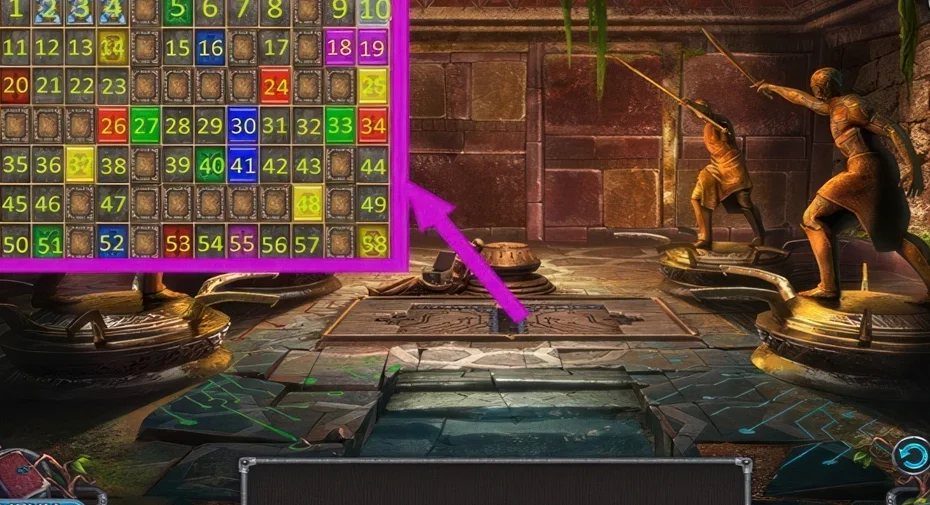
11Final mosaic lock puzzle
Where: Chapter 6, the temple hall with the warrior statues; this ends the game
Complete the final mosaic lock.
Show the full solution
4-14, 2-1, 1-20, 3-22, 22-23, 23-38, 38-36, 36-51, 14-26, 26-29, then the three follow-up lines printed in the walkthrough ending 20-23, 23-14, 58-25, 53-55, 25-1.
This guide covers the researched puzzle stops. Some connecting exploration and item pickups are still being documented.
Collectibles along the way
- Boards · 6 in this chapter (as stated by sources) — Numbered 1/6 to 6/6 and used with nails and hammer at marker O.
- Blue stones · 4 in this chapter (as stated by sources) — Numbered 1/4 to 4/4 and spent at marker V.
- Brushwood · 4 in this chapter (as stated by sources) — Numbered 1/4 to 4/4, burned under the pot for the air potion.
- Stones · 2 in this chapter (as stated by sources) — Numbered 1/2 and 2/2, used at marker F.
- Pattern parts and disks — Walkthrough tracks disks with a pattern 1/2, 2/2 and pattern parts 1/2, 2/2.
- Gears · 3 in this chapter (as stated by sources) — Numbered 1/3 to 3/3 and fitted with the handle at marker F.
Open the Legendary Tales 3 collectibles checklist to tick items off as you play.