Legendary Tales 2 Chapter 6 Walkthrough – Release the Ancient
Legendary Tales: Cataclysm · last updated 2026-10-15
Chapter overview and locations
In the garden Lucia cuts bamboo and builds a blowpipe from poisonous fruit and darts so she can knock out the guards. She gathers six mosaic pieces and frees the Ancient with a rope and hook.
Scenes in this chapter: Garden with bamboo · Path, peg and tent cover · Guards' camp · Captain's room · Sleeping guards' room · Fallen bridge
Step-by-step walkthrough
Follow the scenes below. Required items and screenshots sit beside each stop; answers expand on request. Select a screenshot to enlarge it.
Jump to a scene · 2 sections
Scene 01
Prepare the cover and blowpipe
Work on the tent cover with the peg and rope before crafting the blowpipe.
1Peg, rope and tent cover
Where: Path by the bridge
You need: Peg · Rock · Rope
A rope and peg lift the cover over the hidden-object scene.
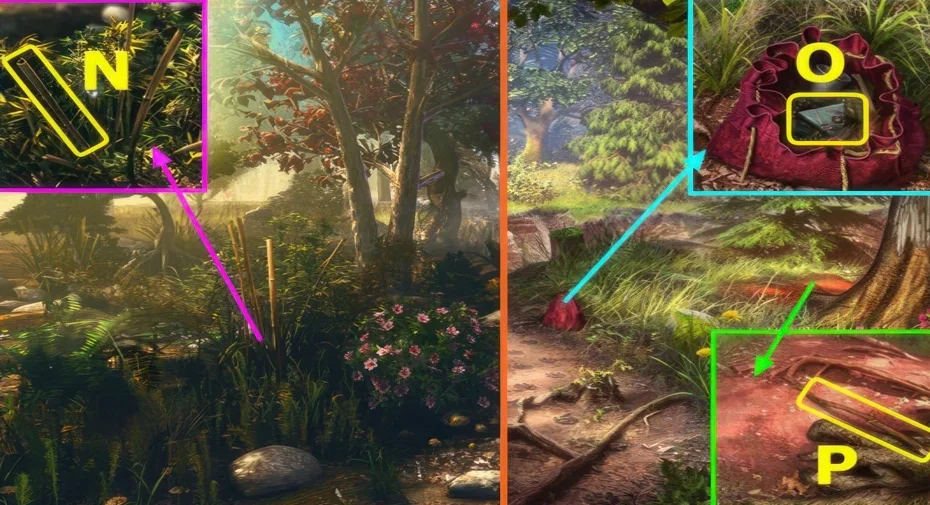
Show the full solution
Hammer the peg into the ground with the rock, tie the rope to it and finish the hidden-object scene under the cover for the shovel.
2Blowpipe crafting
Where: Prison cell and garden
You need: Bamboo · Poisonous fruit · Darts · Bowl of water · Dagger
The darts must be poisoned before they fit the bamboo tube.
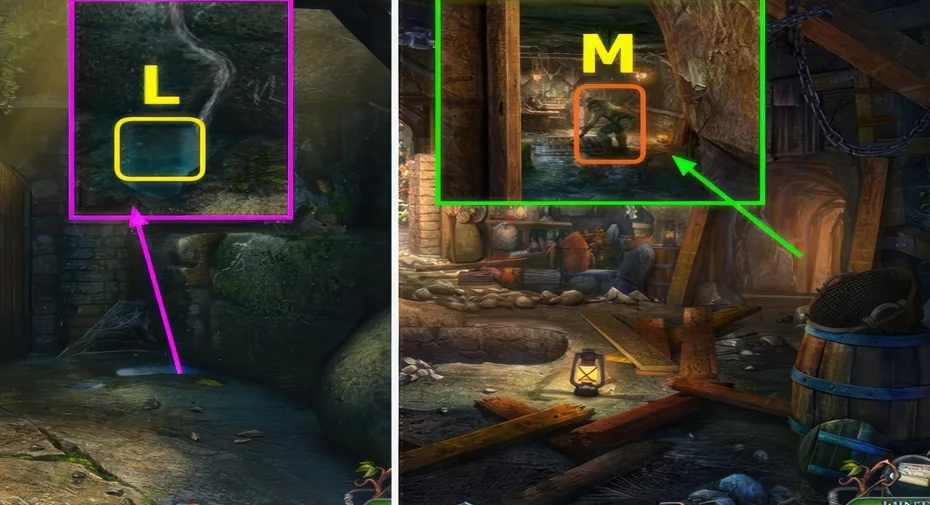
Show the full solution
Take water in the bowl, cut the poisonous fruit with the dagger, dip the darts, then combine the dagger and poisoned darts with the bamboo to make a blowpipe.
Scene 02
Unlock the shield, trapdoor and chest
Use the emblem at the shield and the button at the trapdoor. The six-piece mosaic belongs to the chest.
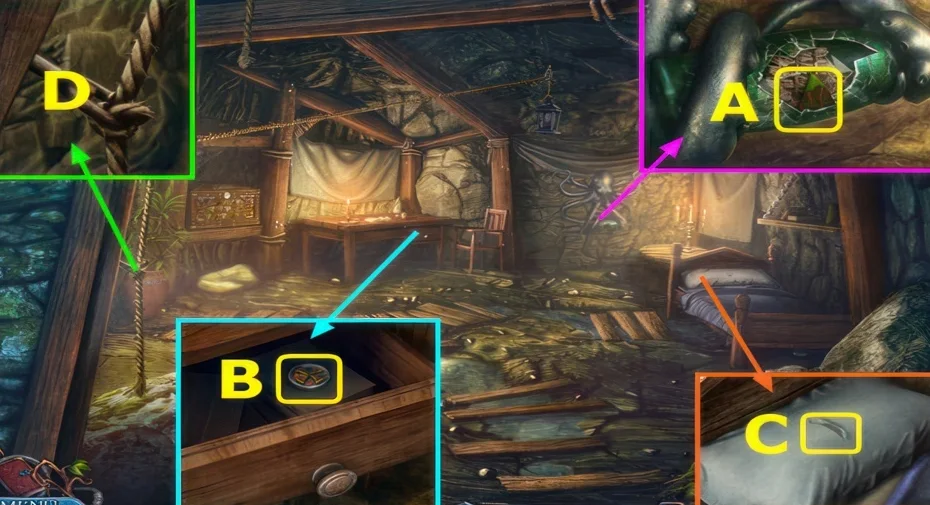
3Emblem shield puzzle
Where: Room of the sleeping guards
You need: Emblems (three pieces)
All three emblems go on the shield.
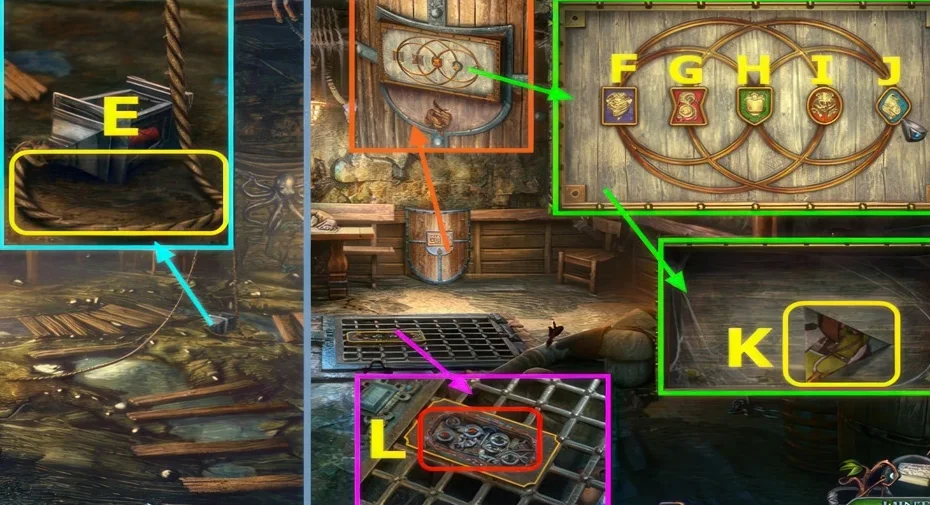
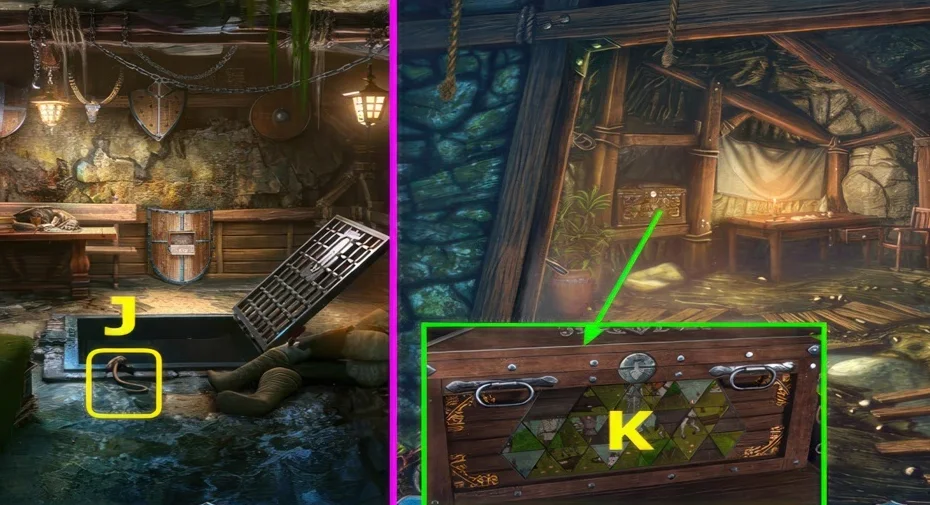
4Trap-door button lock
Where: Floor of the captain's room
You need: Button
The button from the desk drawer unlocks the trap door.
Show the full solution
Order: Hx6-Ix2-Ax5-B-Cx5-Dx2-Ex6-F-G.
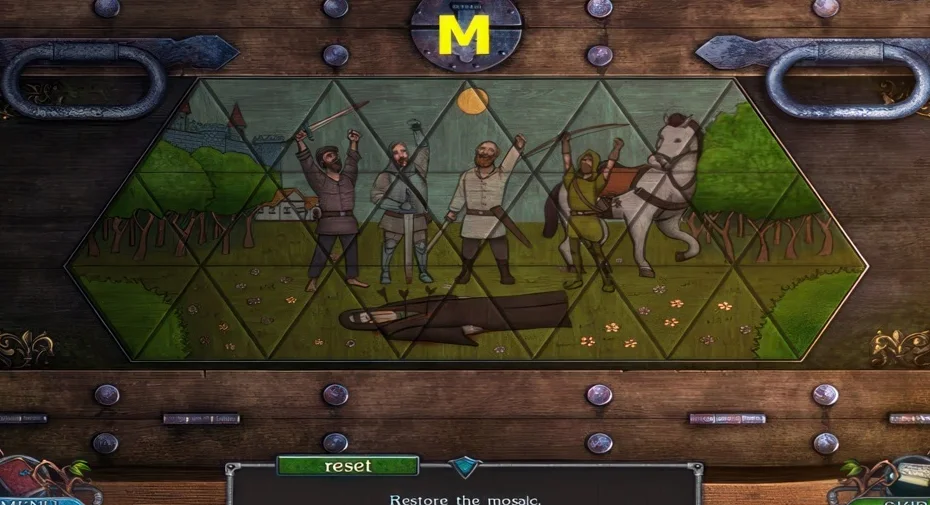
5Six-piece mosaic chest
Where: Captain's room chest
You need: Parts of the mosaic (six pieces)
Every mosaic part has to be found before the chest opens.
This guide covers the researched puzzle stops. Some connecting exploration and item pickups are still being documented.
Collectibles along the way
- Unidentified collection item — Heads are noted by the barrel, under the tree by the bridge and on the shelf to the left.
- Ravens — A collectible bird is noted in the tree in front of the player.
- Morphing objects — Two are noted in the captain's room, one by the puddle and one above the bed.
Open the Legendary Tales 2 collectibles checklist to tick items off as you play.
Commonly missed
- The source reports losing time on the mosaic chest because the tree pieces are hard to place correctly.